As an Ui Designer, I use Figma for all of my projects. Whether I’m creating a website, an app, or social media graphic material, exporting images is an important part of my workflow. In this short tutorial, I’ll show you three easy ways to export images from your Figma design.

Prerequisites
To complete this tutorial, you’ll need:
Figma website template
We’ll use a Figma File that contains a landing page template. It will save us time for this tutorial.

Please, go duplicate the Figma file Here to continue this tutorial with me.
Select Layers plugin
We’ll use the Select Layers Plugin to select multiple images easier.

Download the Select Layers Plugin right here
1- Export a single image
The typical way to export images in Figma is to export one image at a time.
Let’s see how we can do that within our design file.
You can open the tutorial file here.
How To:
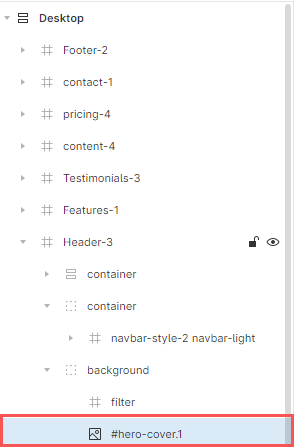
To start, we want to export our hero image.

First, Let’s select the header layer and go to the layer section, inside the background group, select #hero-cover.1.

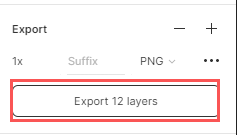
Now, go to the right-hand sidebar, in the export section, hit the + icon.
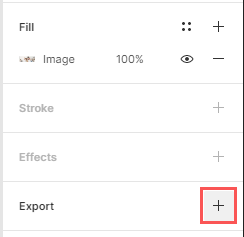
We’ll keep the export options to their default value.
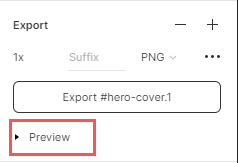
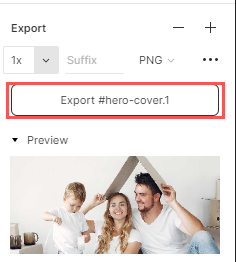
You can hit preview under the Export button to see a preview shot of the image you want to export.

Last, hit the export button and choose your export destination.
2 – Export all your design’s images simultaneously
Assuming that we have a hundred images on our design file that we need to export. It would be incredibly time consuming to export those hundred images one by one; however, Figma has an alternative that allows you to export all the images in your file with a single click.
How to:
First, we must pick and add to the export queue all images of our file.
To do that, Right-click to open the Context menu. Then Select Plugins and choose Select Layers plugin. In the drop-down menu, choose Select Layers by Type, then Select images.
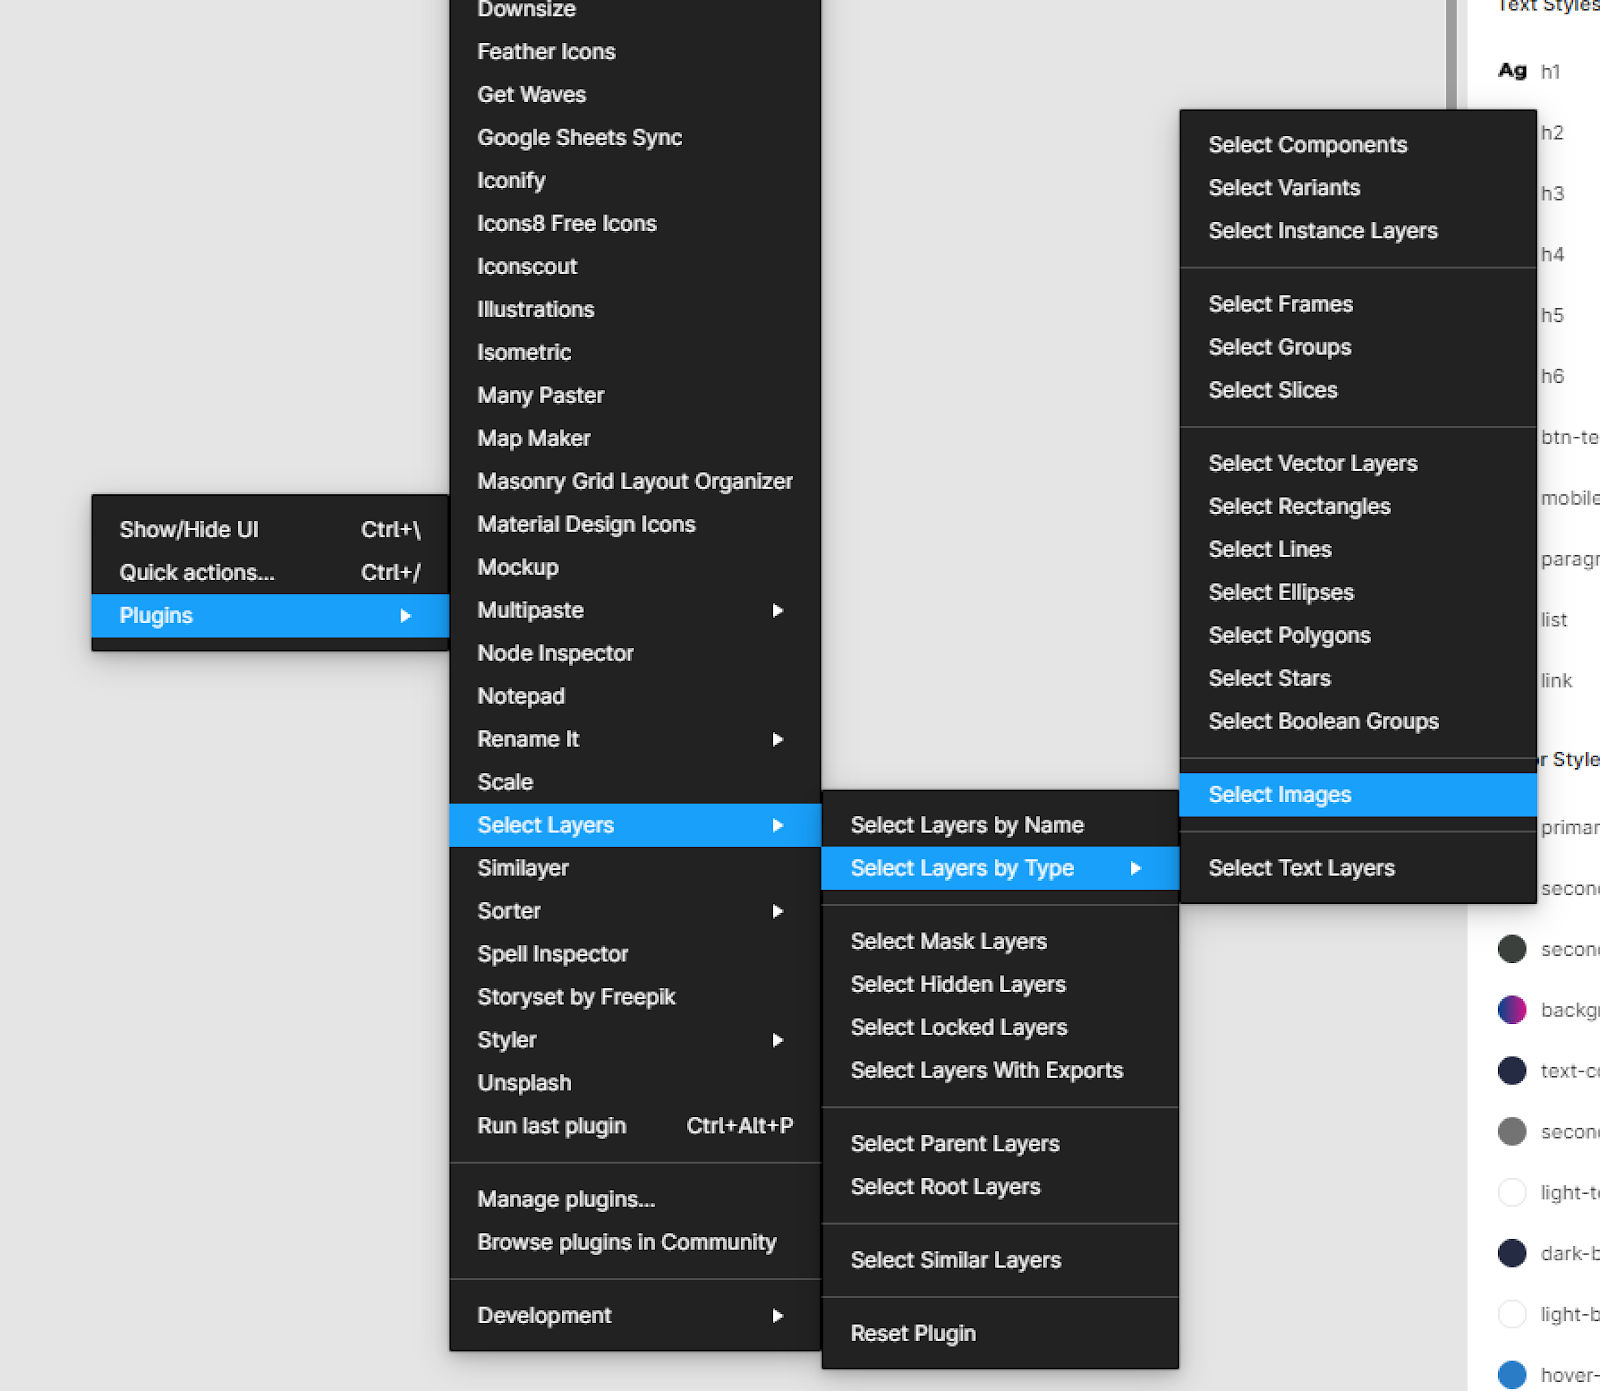
The plugin will select all the images in the page.

Now, go to the right-hand sidebar, in the export section, hit the + icon.

We now have 2 options for exporting all our images simultaneously.
The First one is to click the export button to export.
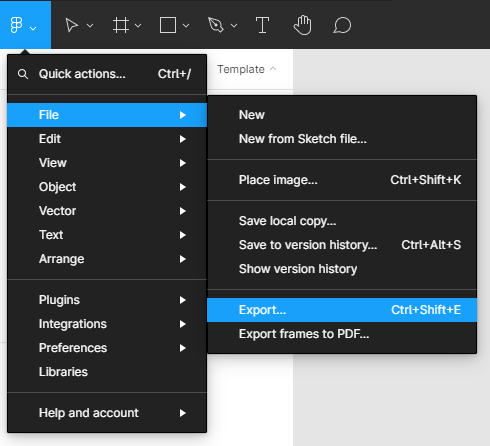
The second one is to go to the tools bar. Click on the Figma icon on the left side of the toolbar.
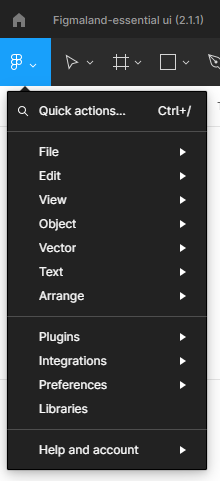
In the context menu, choose File, then select Export.

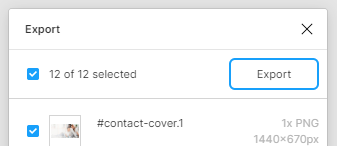
On the right of our canvas will appear an export modal box with all our images to be exported.
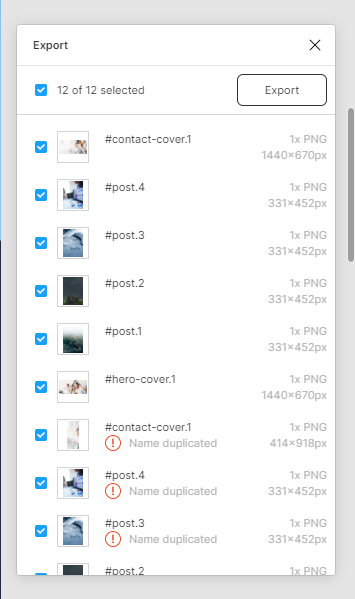
In the export modal we can select and deselect images from the export list.
Once we are satisfied with our export list, we can hit the export button to export our images.
3 – Export multiple images within a specific frame
Let’s assume now that you want to export multiple images in a certain frame instead of the whole file page. You have the ability to do that too with Figma. All we have to do is to select the frame containing our images and export.
Let’s take a look at an example from our concept file. Presume, we only want to export the images in our content frame.

How to:
Let’s start by selecting the content frame, then go to the tools bar. Click on the Figma icon on the left side of the toolbar. In the context menu, choose File, then select Export.
An export modal box will appear on the right side of our canvas, listing all our images that will be exported.

In the export modal we can select and deselect images from the export list.
Once we are satisfied with our export list, we can hit the export button to export our images.
Conclusion
Within this short Figma tutorial, we’ve covered exporting a single image, exporting multiple images within the design’s page, and exporting multiple images within a specific frame.
I hope you find this tip helpful, and I’ll see you again soon with some short tips.