Posts are the backbone of any WordPress site, from blogs to news updates and beyond. With WordPress, you can easily create and organize your content using intuitive tools like categories and tags. This guide will help you get started with creating and managing posts effortlessly.
Step-by-Step: How to Create a New Post
1. Access the Post Editor
- Log in to your WordPress Dashboard.
- Navigate to Posts > Add New in the Admin Sidebar.
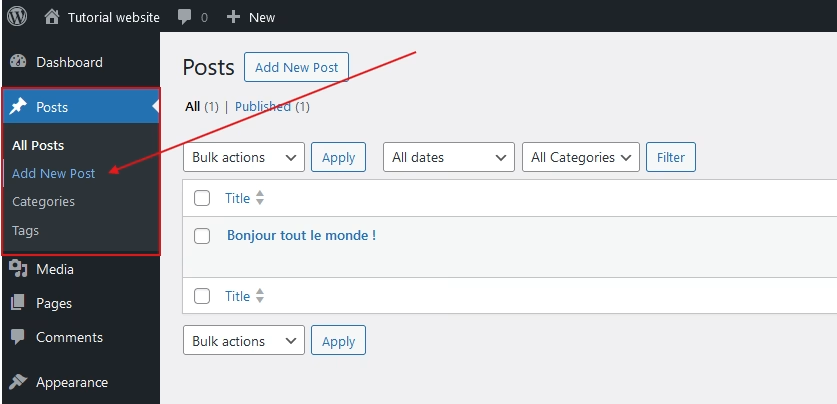
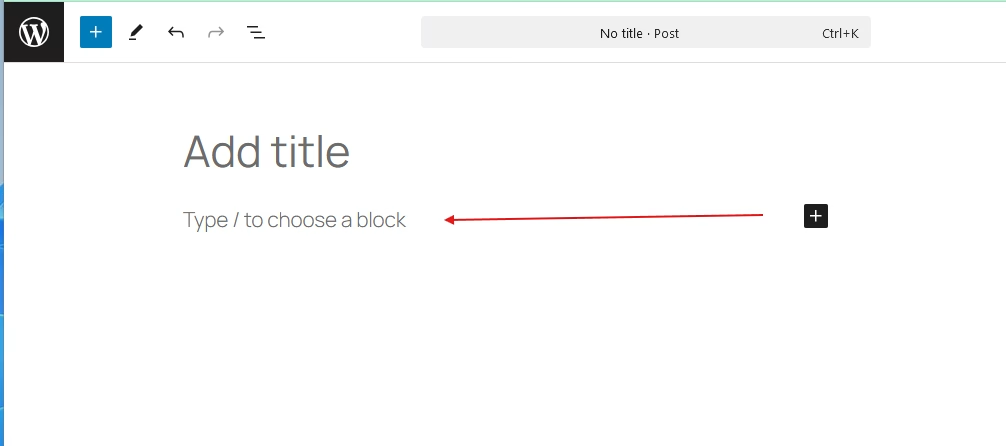
This will open the WordPress Block Editor, where you can craft your content using blocks for text, images, videos, and more.
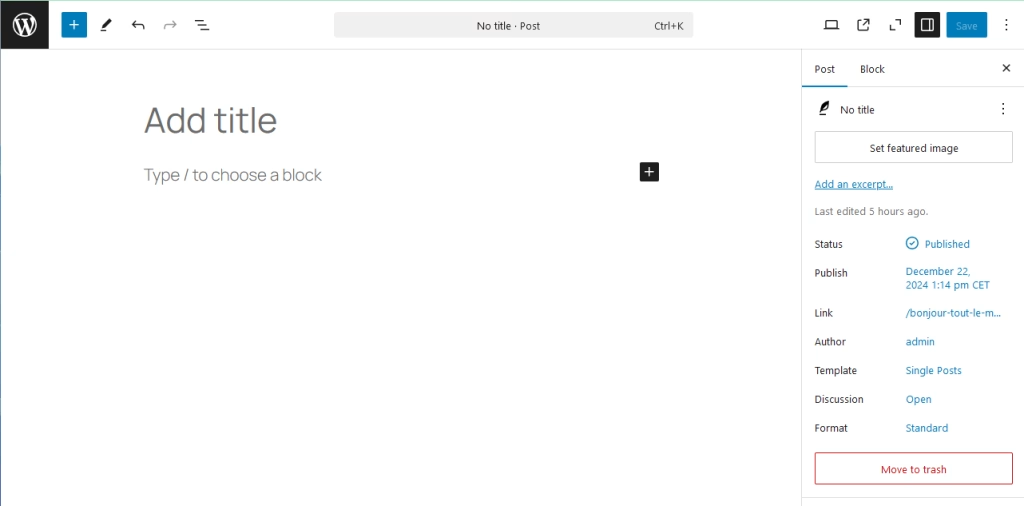
2. Add a Title and Content
- Title: At the top, add your post’s title. This becomes the headline that visitors and search engines see.
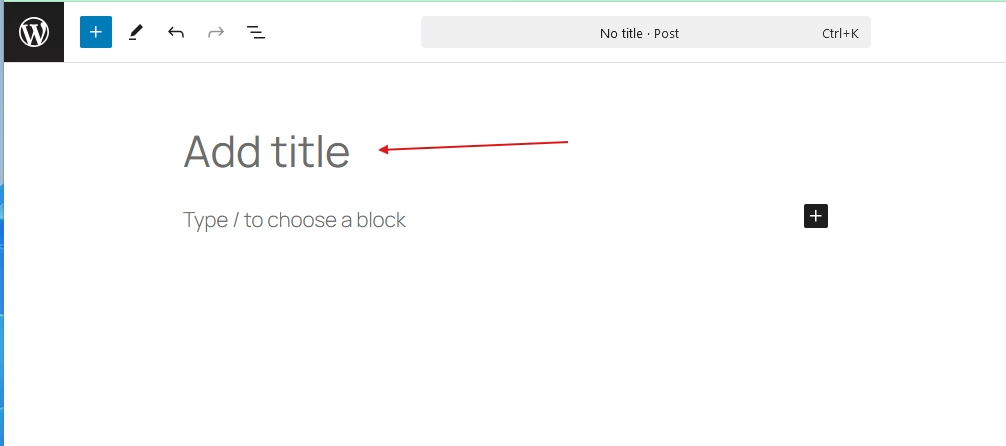
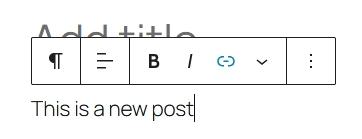
- Content: Use the Block Editor to add paragraphs, images, and other media. Each piece of content is a “block” you can move or customize.
Tip: Use the formatting tools in the block toolbar to style text or add links.
3. Organize with Categories and Tags
What Are Categories?
Categories are broad groupings for your posts. For example, if you run a food blog, you might have categories like “Recipes,” “Tips,” and “Reviews.”
How to Add a Category:
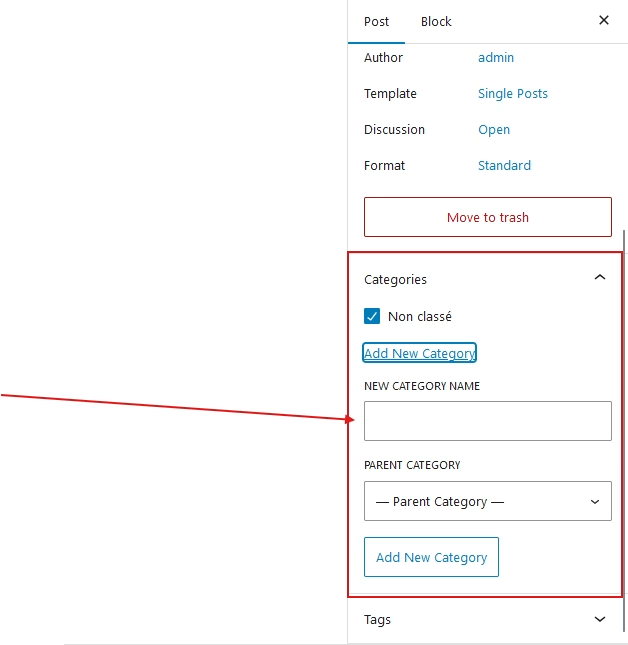
- In the right-hand Post Settings Panel, find the Categories section.
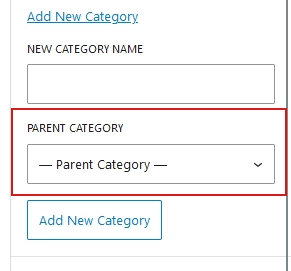
- Click Add New Category.
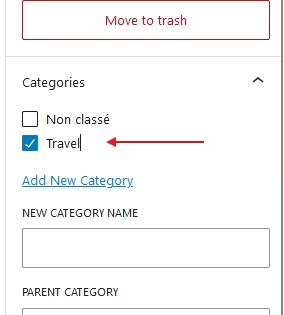
- Enter a name (e.g., “Travel”), then click Add New Category to save.
You can also assign the post to an existing category by checking the box next to its name.
Tip: Use parent and child categories for better organization. For example, a parent category like “Recipes” could have child categories like “Breakfast” or “Dinner.”
What Are Tags?
Tags are more specific keywords or phrases that describe your post’s content. They’re optional but helpful for improving search and navigation.
How to Add Tags:
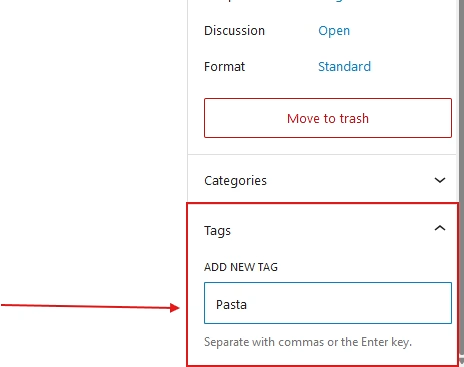
- Find the Tags section in the same Post Settings Panel.
- Type a word or phrase (e.g., “Pasta”) and press Enter.
- Add as many tags as you like, separated by commas.
4. Add Media to Your Post
To make your post visually appealing:
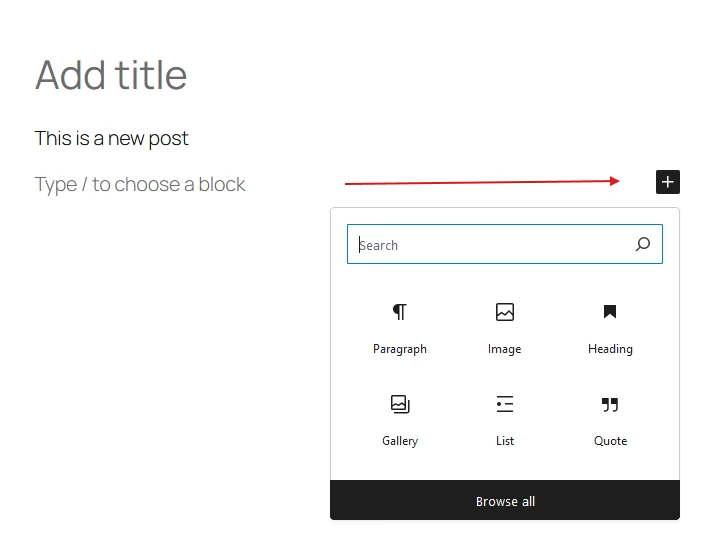
- Click the Add Block button (a “+” icon).
- Select the type of media you want to include: Image, Gallery, Video, etc.
- Upload files from your computer or choose from the Media Library.
Tip: Use high-quality images and videos to make your posts stand out.
5. Configure Additional Post Settings
Before publishing, tweak these settings:
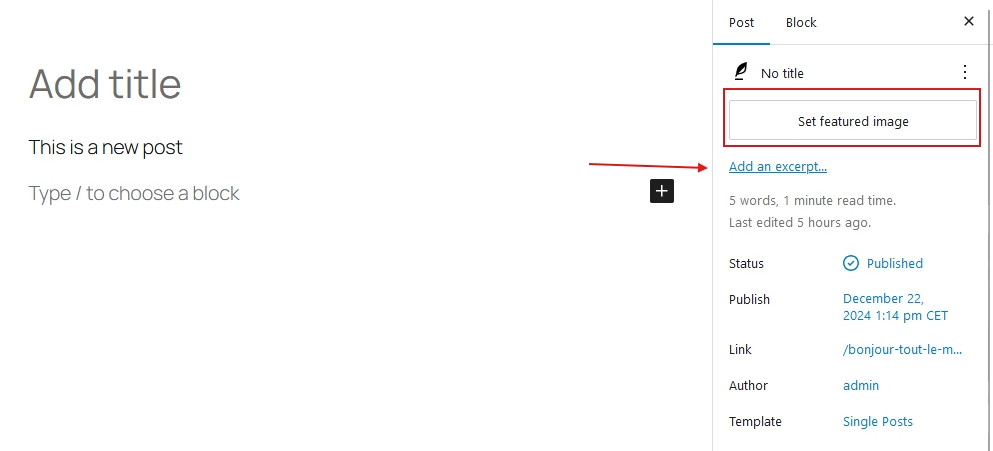
- Featured Image: Set a main image for the post in the Featured Image section. This image often appears as a thumbnail on your homepage or archive pages.
- Excerpt: Write a brief summary of your post in the Excerpt section. It’s optional but useful for previews.
6. Preview and Publish
Click Preview at the top-right corner to see how your post will look.
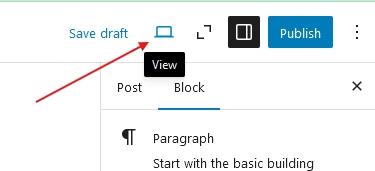
When you’re satisfied, click Publish.
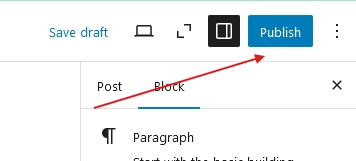
Confirm by clicking Publish again in the dialog box.
Your post is now live for the world to see!
Editing and Managing Posts
After publishing, you can always make changes:
- Go to Posts > All Posts.
- Hover over the post you want to edit and click Edit.
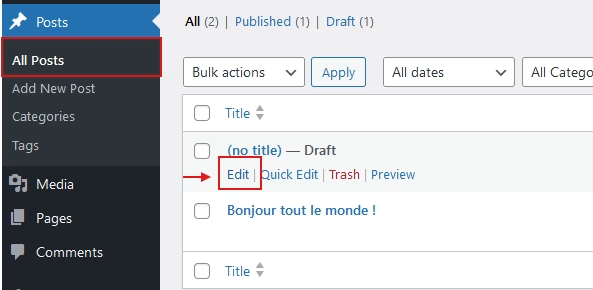
Update content, categories, tags, or other settings.
Best Practices for Categories and Tags
- Use Categories Sparingly: Stick to a few main categories to keep your site organized.
- Be Generous with Tags: Use tags liberally to describe specific topics or keywords.
- Avoid Duplication: Don’t use the same word as both a category and a tag.
Conclusion
Creating and organizing posts in WordPress is a breeze once you understand the basics. With categories and tags, you can keep your content structured and user-friendly, ensuring visitors (and search engines) find what they’re looking for.
Ready to start posting? Log in to your WordPress dashboard and let your creativity flow!
Related Articles You Might Enjoy
Looking to deepen your WordPress knowledge? Check out these helpful guides:
Dive into these articles and take your WordPress skills to the next level!
