Template parts are modular, reusable sections of a WordPress site’s layout, such as headers, footers, and sidebars. They are essential for building and managing navigation and other patterns that you can use across all the pages of your website, allowing you to edit these elements from one central place.
By default, WordPress provides template parts such as the header, footer, and sidebar. However, you’re not limited to these; you can create as many as you need, including multiple headers or footers for specific purposes. For instance, you can design one header for your main website and another for your blog. Similarly, you can create specialized footers tailored to different areas of your site.
Editing Your Header, Footer, and Navigation Menus
1 – Editing Existing Template Parts
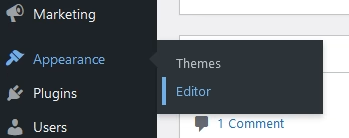
- Access the Site Editor
- Navigate to Appearance > Editor in your WordPress dashboard to open the Site Editor.
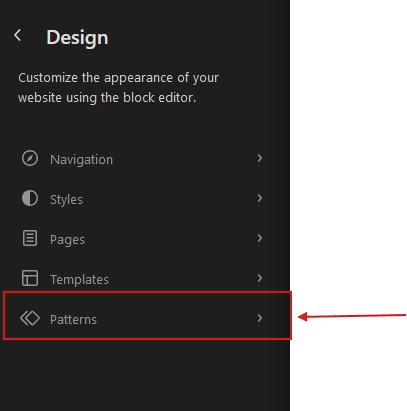
- Open Patterns
- In the Site Editor, go to the Patterns section.
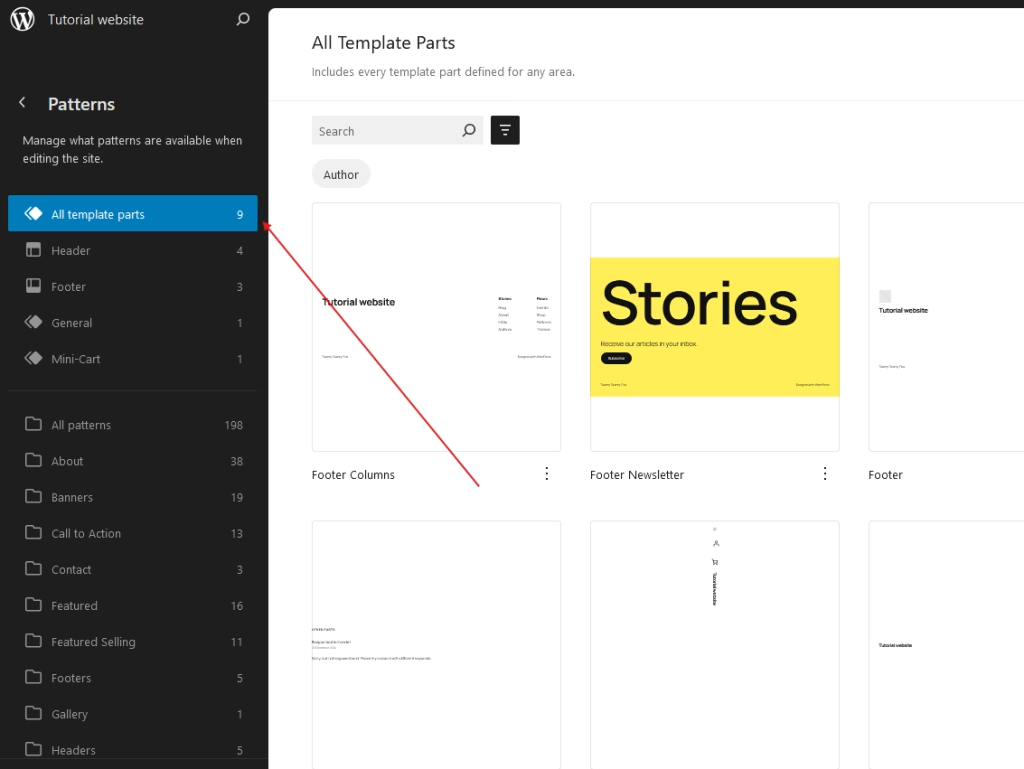
- View Template Parts
- Select All Template Parts to display all the available parts of your site.
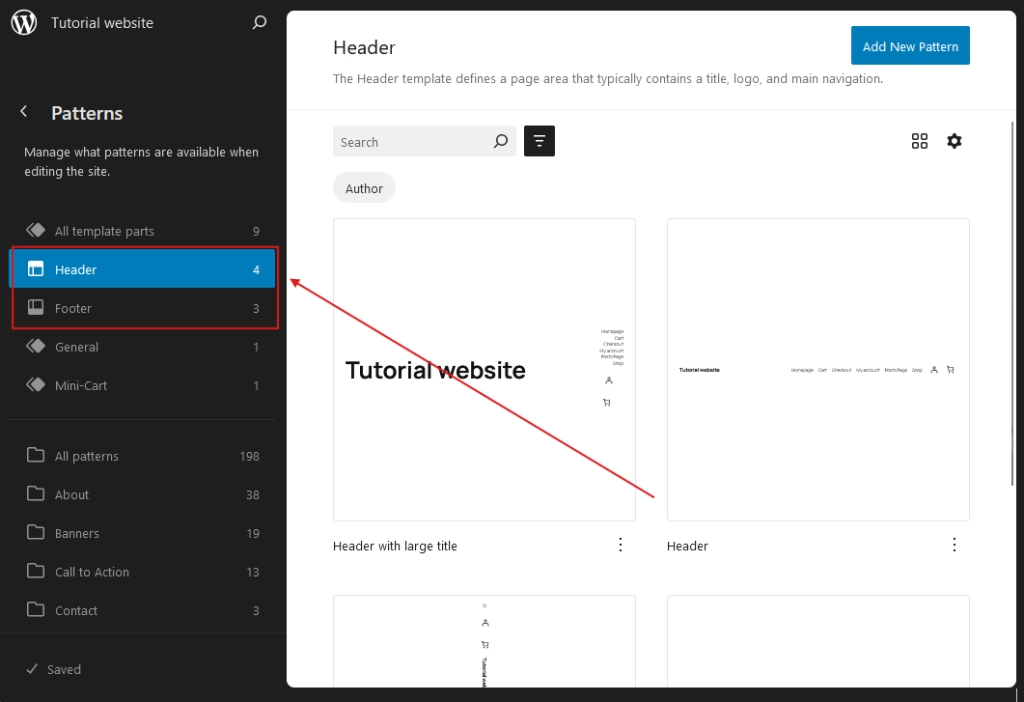
- Filter by Header or Footer
- Under All Template Parts, choose Header or Footer to filter and display only the relevant template parts.
- Inspect Template Layers
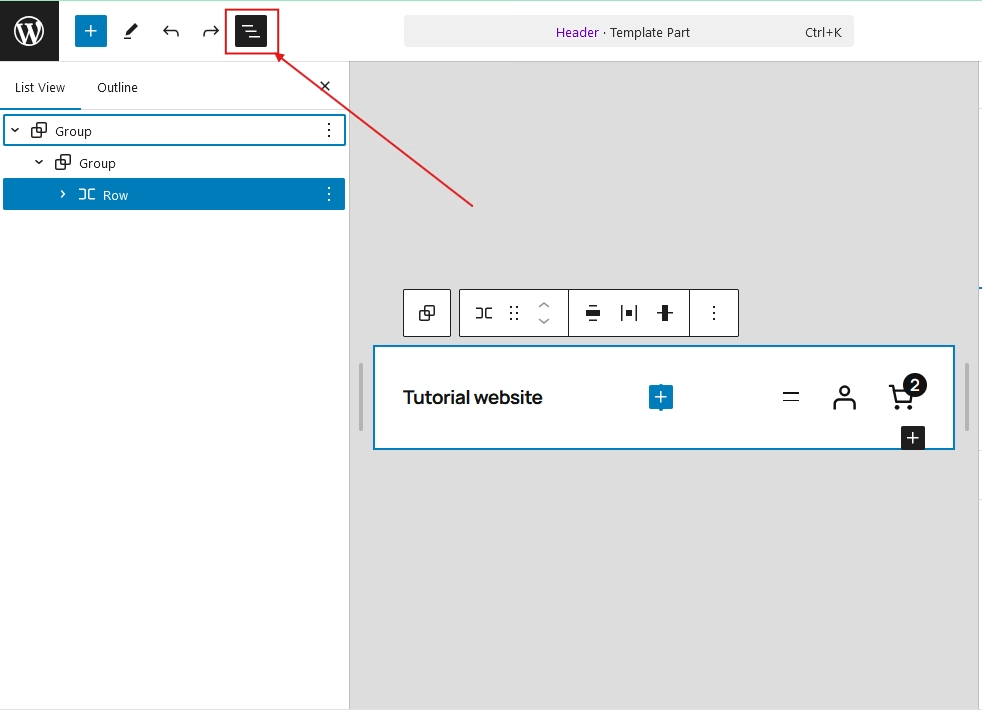
- After selecting a template part, click the Layers button in the top-left toolbar to view the structure of the template.
- Edit Components
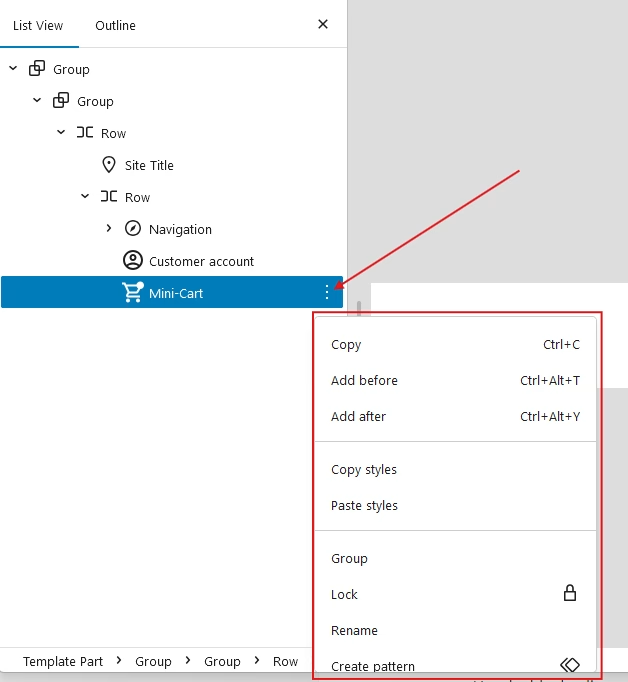
- Select any component within the template part.
- Use the three dots icon (on the right of the component) to adjust settings or delete the component if needed.
- Add New Blocks
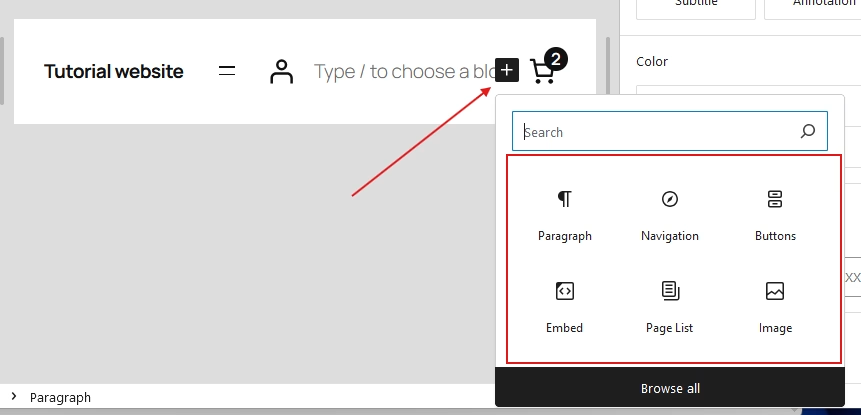
- You can add a block before or after any component:
- Click Add Before or Add After.
- You can add a block before or after any component:
- Then, use the + button to insert a new block.
- Save Changes
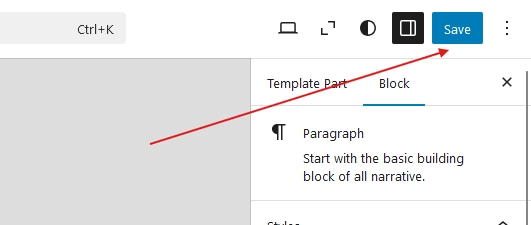
- Once you’ve made your adjustments, click Save to apply the changes to your site.
2 – Managing Navigation Menus in Header or Footer
Select a Template Part
- In the Site Editor, go to Patterns > Header or Footer and choose the template part you want to edit.

Access the Navigation Block
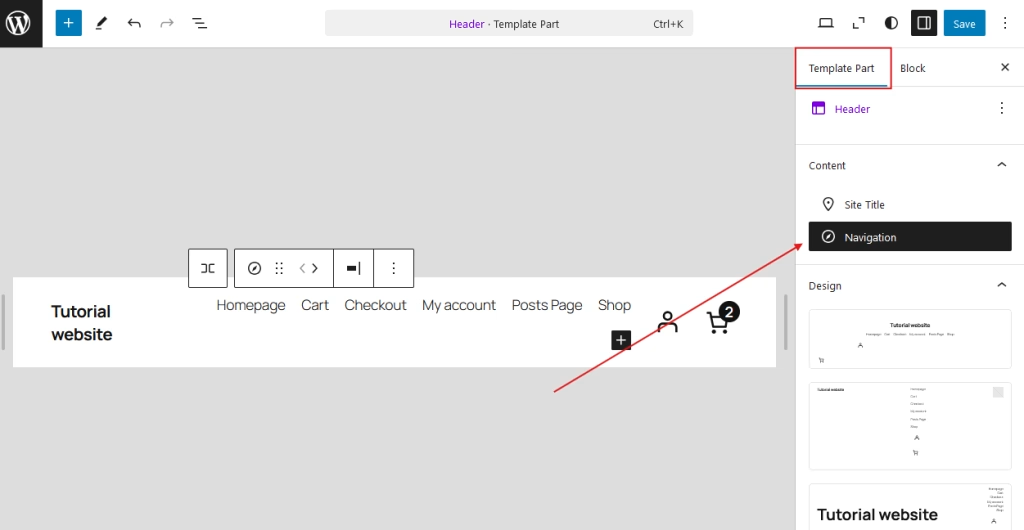
- In the sidebar under the Template Part tab, select Navigation to focus on the navigation block within your chosen template part.
Open Block Settings
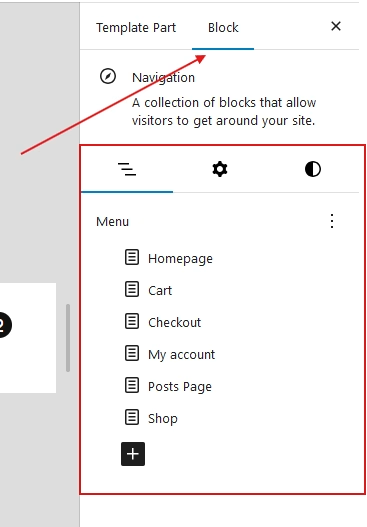
- Once the navigation block is selected, switch to the Block tab in the sidebar to access the block’s settings.
Customize the Menu
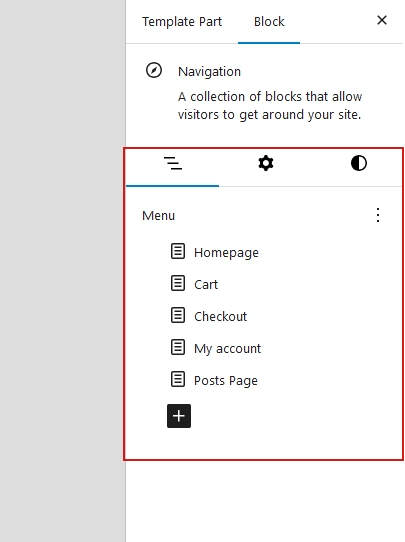
- In the Menu section of the block tab, adjust the links as needed to fit your site’s navigation requirements.
Additional Menu Options
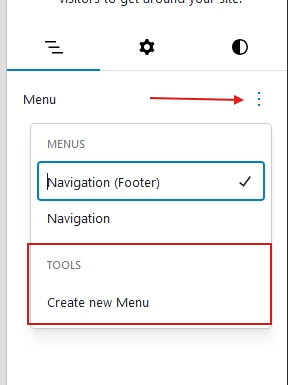
- Select an Existing Menu: If you have a pre-existing menu, click the three dots in the top-right corner of the menu section to select it.
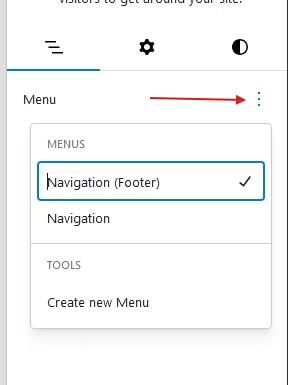
- Create a New Menu: Alternatively, you can create a brand new menu by selecting the option to create a new one within the sidebar.
Save Changes
- Once you’ve made your adjustments, click Save to apply the changes to your site.

Explore Advanced Navigation Customization
- For more detailed instructions and tips, refer to Mastering Navigation in the 2025 WordPress Editor: A Step-by-Step Guide.
Creating a New Header Template Part
Open the Site Editor
- In your WordPress dashboard, navigate to Appearance > Editor to access the Site Editor.
Go to Template Parts
- Once in the Site Editor, click on Template Parts in the left-hand panel.
Create a New Header
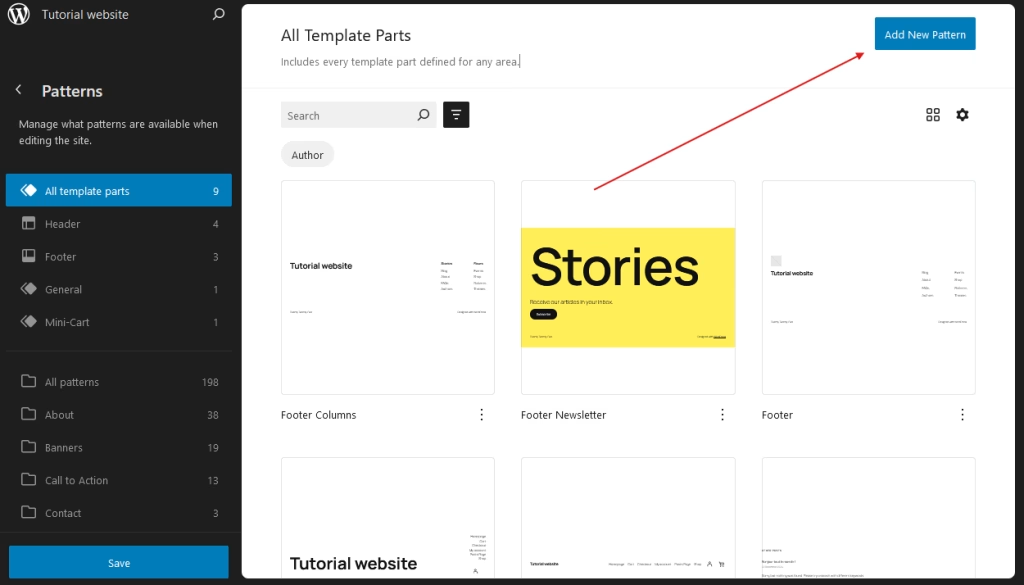
- Click the Add New Pattern button.
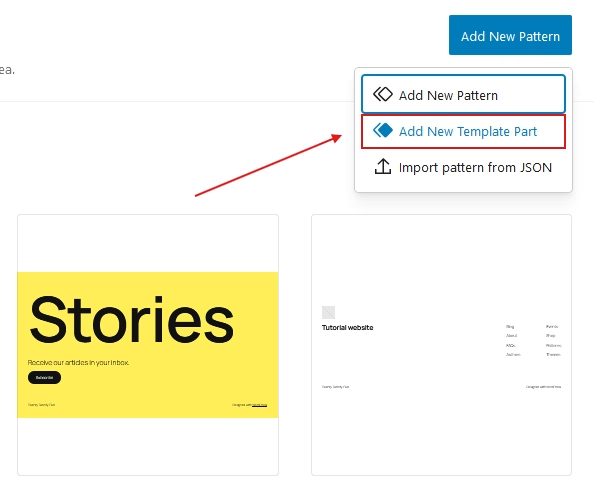
- In the drop-down menu, select Add New Template Part
Name Your Header
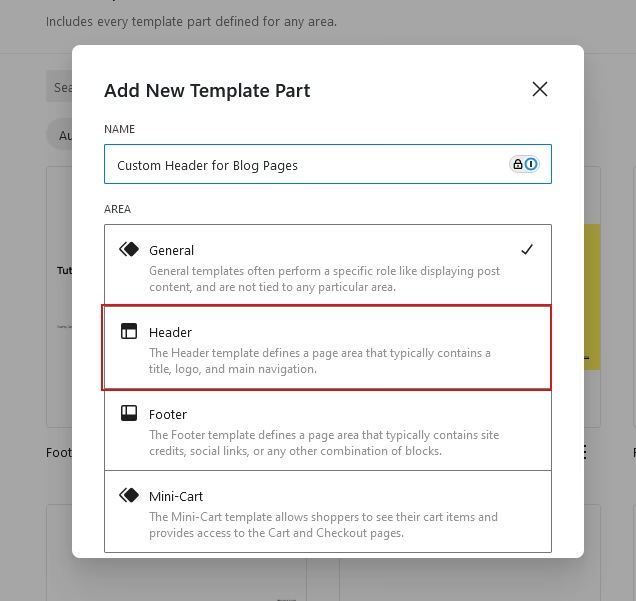
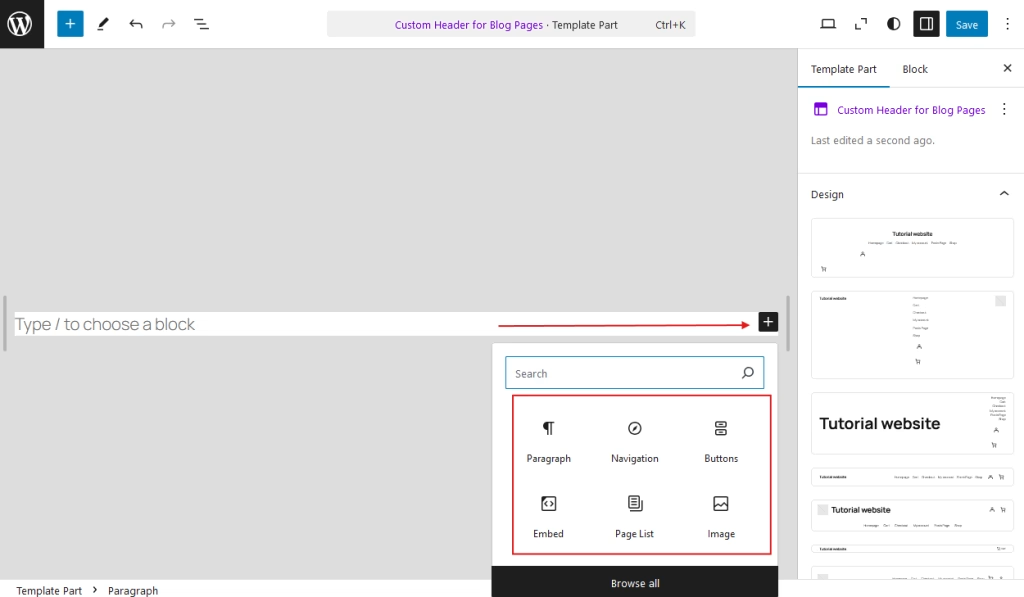
- Enter a descriptive name for your new header, such as Custom Header for Blog Pages, then select Header, and click Add
Design the Header
- Use the block editor to build your header. You can add:
- Site Logo for branding
- Site Title for your website name
- Navigation Block to include menus.
Save Your Work
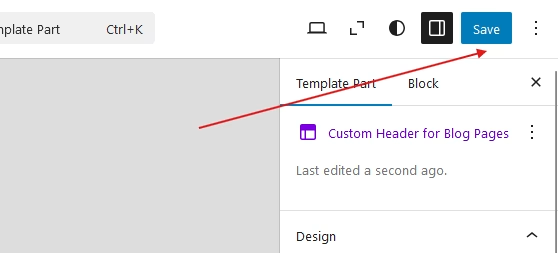
- Once you’re satisfied with the design, click Save to store your new header template part.
Assigning a New Header to Specific Templates in the Site Editor
Follow these steps to assign your new header to specific templates in the Site Editor:
Open the Site Editor
- Go to Appearance > Editor in your WordPress dashboard to launch the Site Editor.
Access Templates
- In the Site Editor, click on Templates in the left-hand panel to view the list of available templates.
Select a Template
- Choose the template you want to update, such as Single Post or Page, and click on it to edit.
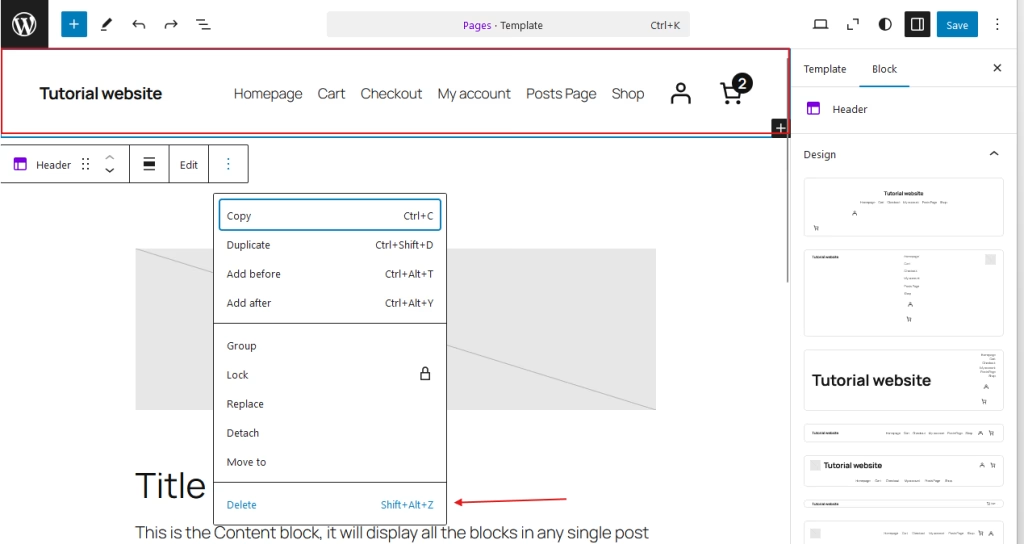
Remove the Existing Header
- Locate the existing header block in the template.
- Right-click on the header block and select Delete to remove it.
Add a New Header
- Click the + button in the top-left toolbar to open the block inserter.
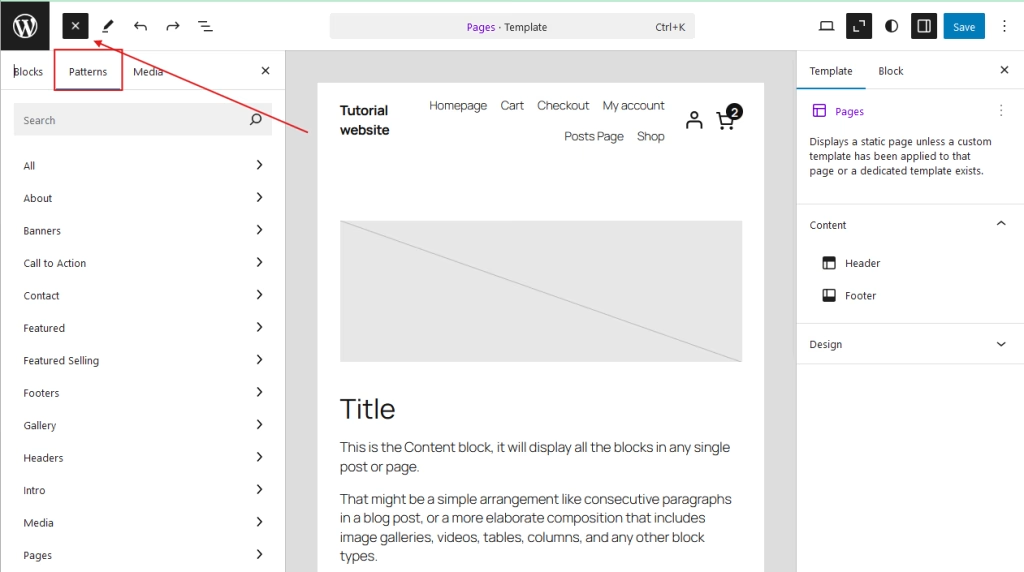
- Go to the Patterns tab and search for the Template Part block.
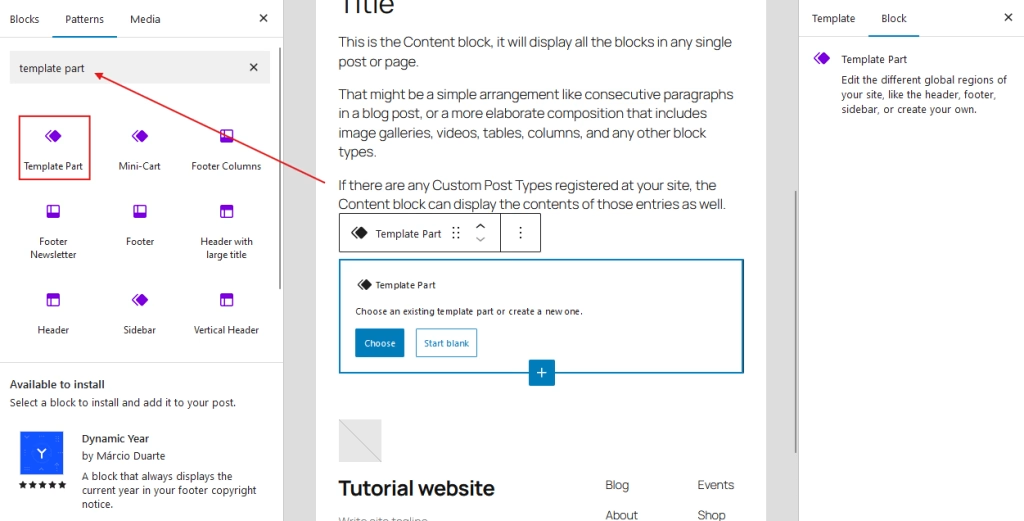
- Add the Template Part block to your template.
Assign Your Header
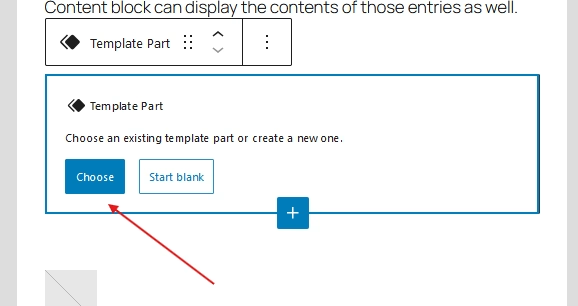
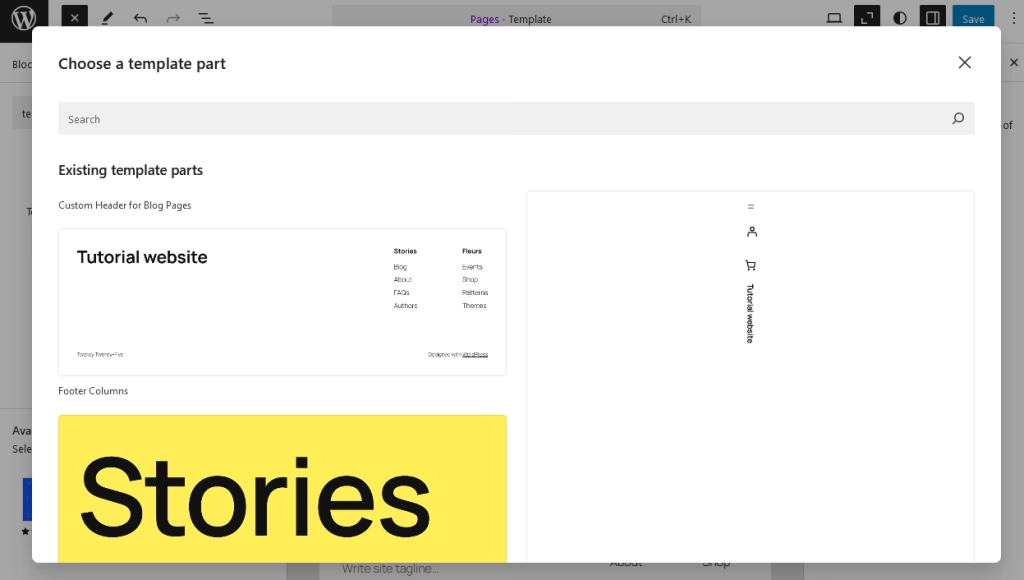
- In the Template Part block, click Choose and select your new header from the list of available options.
Adjust Placement
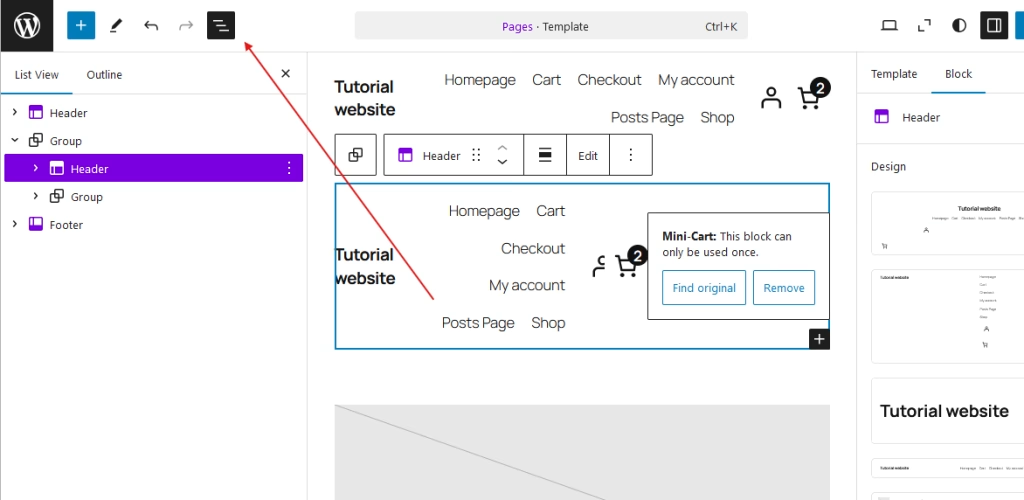
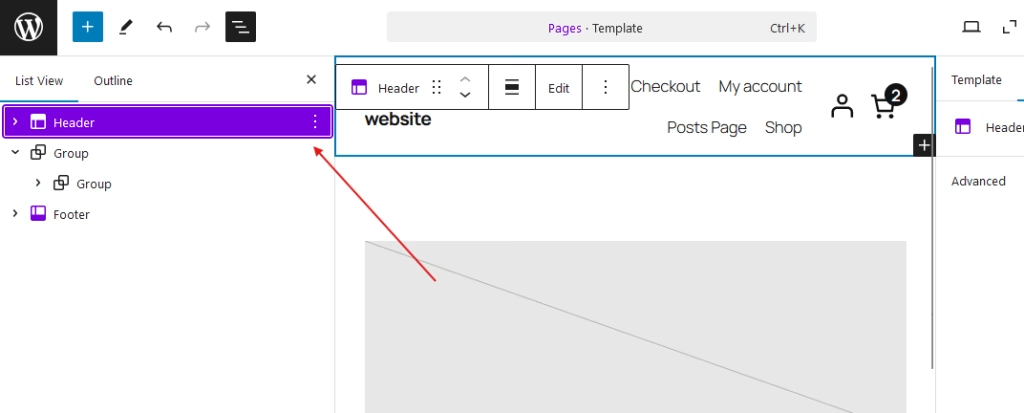
- Open the Layers sidebar by clicking the Layer button in the toolbar.
- Drag the header layer to the top of the template’s structure to ensure it’s in the correct position.
Save Your Changes
- Once the new header is correctly positioned, click Save to apply the changes.

Conclusion
Template parts in WordPress Full Site Editing (FSE) provide a flexible, modular approach to managing your site’s layout. They allow you to design reusable sections such as headers, footers, and sidebars that can be applied across all pages, saving you time and effort in site management. The ability to create multiple template parts for different areas of your site, such as separate headers for your homepage and blog, ensures that you can cater to specific needs and enhance your site’s user experience. With this powerful feature, you can maintain a cohesive design while having the flexibility to customize every part of your site.
Related Articles You Might Enjoy
Looking to deepen your WordPress knowledge? Check out these helpful guides:
- Mastering Navigation in the 2025 WordPress Editor: A Step-by-Step Guide
- The Complete Guide to WordPress Page Templates 2025
Dive into these articles and take your WordPress skills to the next level.


