WordPress offers a powerful Block Styles panel that enables you to personalize the design of individual blocks. From editing colors and typography to adjusting spacing and adding inline CSS, this feature provides everything you need to create a professional website. Follow this step-by-step guide to learn how to customize block styles effectively.
Step 1: Navigate the WordPress Block Styles Panel
Before making changes, it’s important to understand how to access and navigate the Block Styles panel. Here’s what you need to know:
Enable Block Previews
- Log in to your WordPress dashboard.
- Navigate to Appearance > Editor to open the Full Site Editor.
- Click the Styles button in the sidebar.
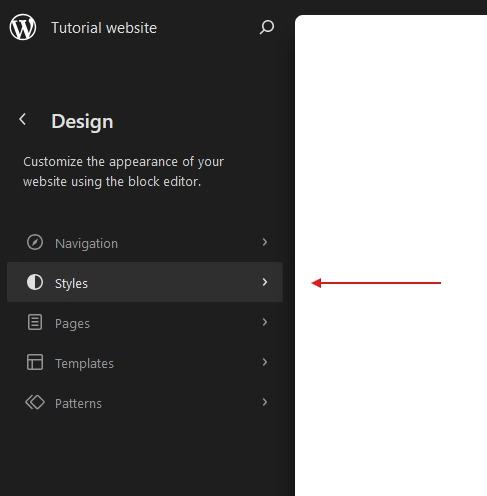
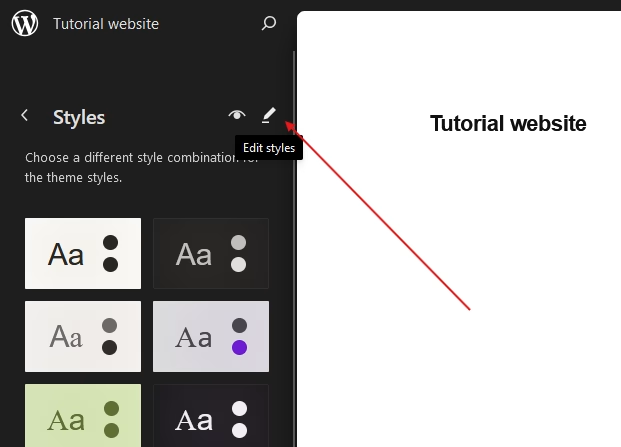
- In the Styles section, click the Edit Styles icon in the top-right corner.
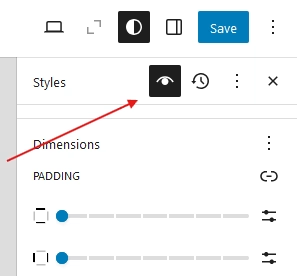
- Turn on the preview mode by clicking the eye icon at the top of the Styles panel. This lets you view all available blocks in real time.
Explore Block Categories
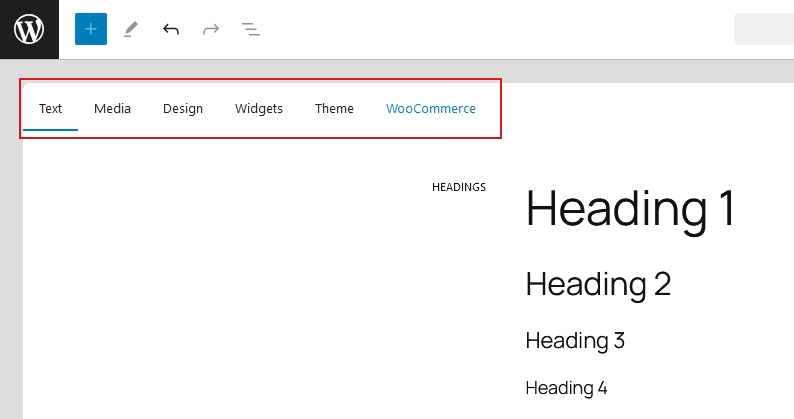
- Use the tab menu in the preview canvas to browse through different block categories, making it easier to find the blocks you want to customize.
Access Individual Block Settings
- Navigate to the Blocks section in the sidebar
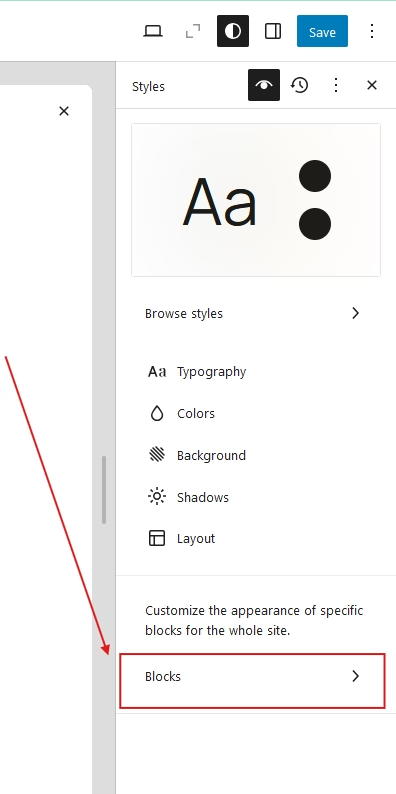
- Select a block from the list to open its customization options.
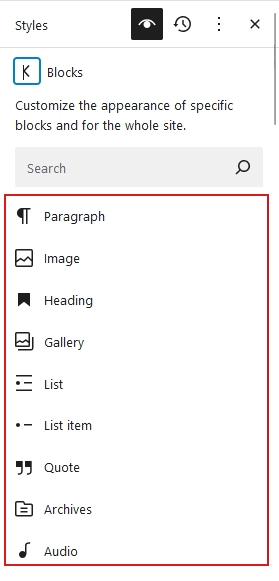
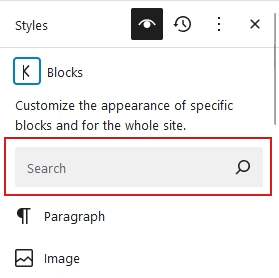
- Use the search bar to quickly locate a specific block.
Step 2: How to Customize Block Colors in WordPress
Color plays a significant role in your website’s design. Here’s how to update block colors:
- Go the ELEMENTS section for your selected block.
- Choose a color using the color picker or select a predefined option from the PALETTE section.
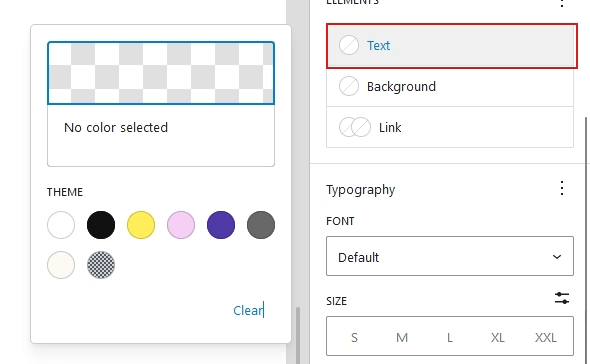
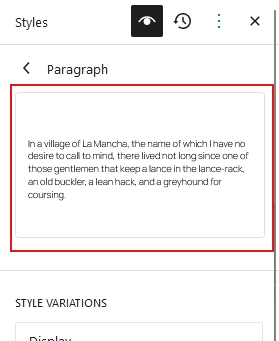
The live preview at the top of the Styles panel will instantly show the updated colors.
Step 3: Editing Typography for WordPress Blocks
Typography customization helps ensure your website text is both readable and visually appealing.
- Navigate to the TYPOGRAPHY section of your selected block.
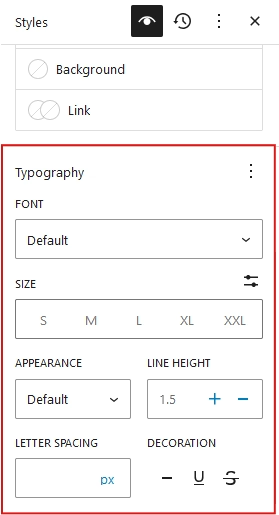
Adjust the font face, size, weight, line height, and more to achieve your desired style.
View the updates in the live preview as you make changes.

Step 4: Adjusting Padding and Margins in WordPress Blocks
Spacing is essential for creating a clean and balanced layout:
- Go to the DIMENSIONS section to adjust PADDING and MARGIN.
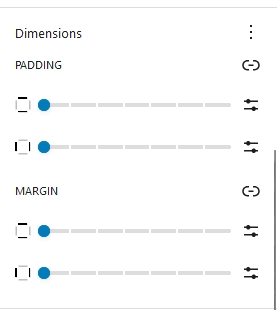
Use sliders for predefined spacing or enter custom values manually for precise adjustments.
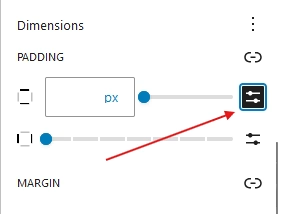
Step 5: Adding Borders and Rounded Corners in WordPress
Borders and rounded corners can add a polished look to your blocks:
- Go to the BORDER section to set a border color, thickness, and style.
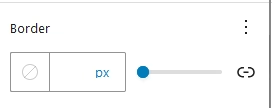
- Adjust the corner radius to create rounded edges and a more modern design.

Step 6: Adding Custom CSS to WordPress Blocks
For advanced customization, the Advanced section lets you inject custom CSS directly into blocks:
- Enter your CSS properties and values (e.g.,
border: 2px solid #000; margin: 10px;).
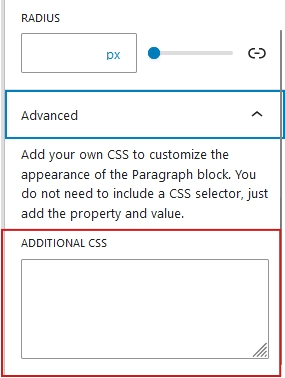
No need to include selectors—just add the style rules you want to apply.
Example: Add unique styles to buttons or other elements with inline CSS.
Conclusion
Customizing block styles in WordPress is an essential skill for creating a unique and visually appealing website. By following this guide, you can optimize your block designs, refine your site’s aesthetics, and deliver a better user experience.
Start exploring the Block Styles panel today to unlock your website’s full potential!
Related Articles You Might Enjoy
Looking to deepen your WordPress knowledge? Check out these helpful guides:
- How to Edit Typography in WordPress: Install Fonts, Set Responsive Sizes, and Enhance Your Design
- How to Edit Colors, Apply Palettes, and Style Buttons and Links in WordPress 2025
- How to Optimize Layout Dimensions in WordPress: A Complete Guide
Dive into these articles and take your WordPress skills to the next Level.
