Customizing the color palette of your WordPress site is a crucial step in creating a visually cohesive and appealing design that reflects your brand. In this tutorial, we will explore how to access and edit color settings, apply predefined palettes, customize those palettes, and assign colors to specific elements like buttons and links using the WordPress Editor. Whether you’re a beginner or an experienced user, this guide will provide you with actionable steps to achieve the perfect look for your website.
How to Access Color Settings in WordPress Editor
To begin editing your site’s color styles, follow these steps:
- Log in to your WordPress dashboard.
- Navigate to Appearance > Editor to open the Full Site Editor.
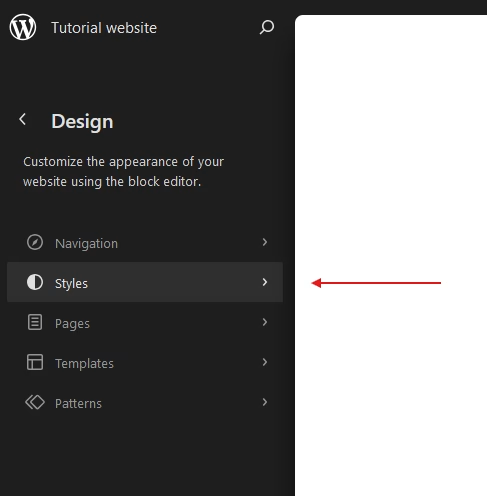
- Click on the Styles button in the sidebar.
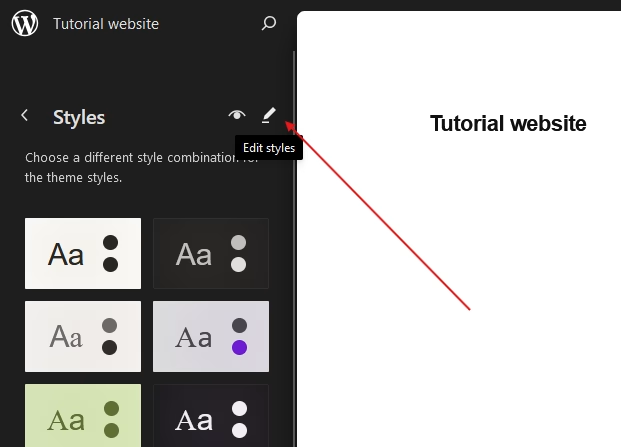
- In the Styles section, click on the Edit Styles icon located in the top-right corner.
- Select Colors from the Styles panel to access the global color settings.
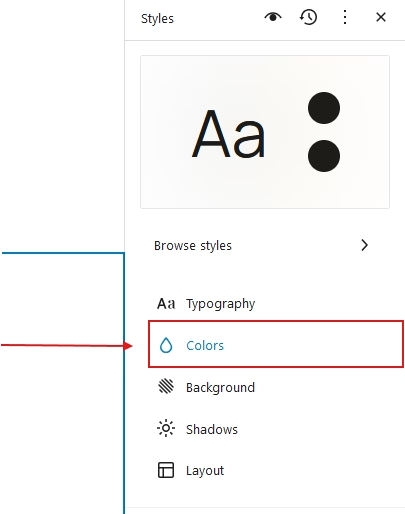
By completing these steps, you’ll have access to the tools needed to modify your site’s color palette.
Applying Predefined Color Palettes in WordPress
WordPress themes, such as Twenty Twenty-Five, often come with a range of predefined color palettes. Here’s how you can apply them:
- In the Colors panel, select Palette.
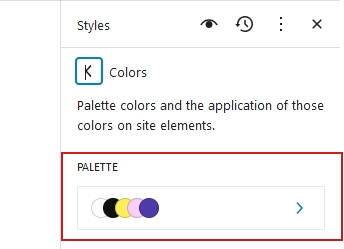
- Browse through the available palettes and choose the one that best suits your website’s design.
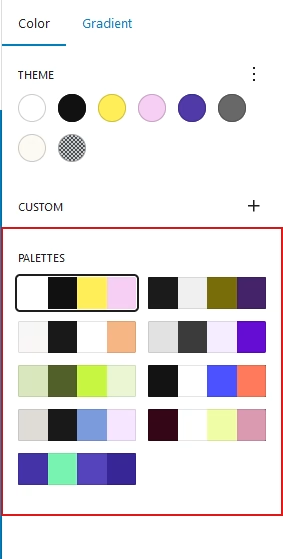
Once applied, the selected palette will automatically update your site’s global color scheme.
Customizing Color Palettes in WordPress
After selecting a predefined palette, you may want to make adjustments to better fit your needs. To customize the colors in a palette:
- Navigate to the Theme section within the Colors panel.
- Select a color from the palette.
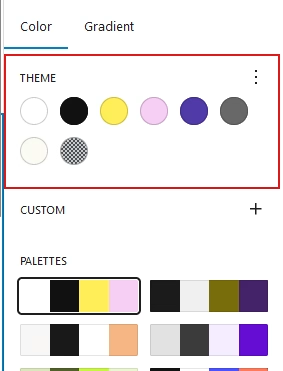
- Use the color picker to modify the color or input a specific hex code.
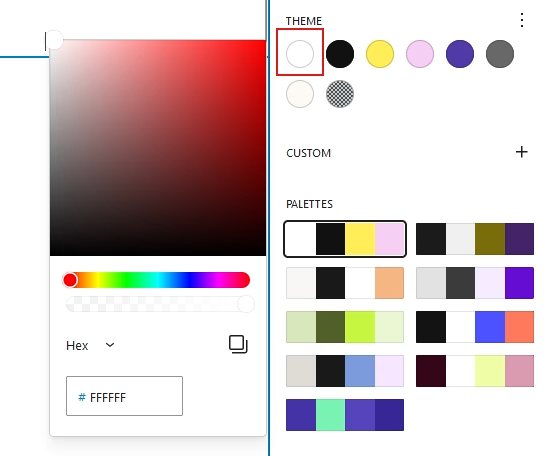
These changes will instantly reflect across your website, maintaining consistency in your design.
Assigning Colors to Basic Elements, Buttons, and Links
Changing Colors for Buttons
- In the Elements section of the Colors panel, select Button.
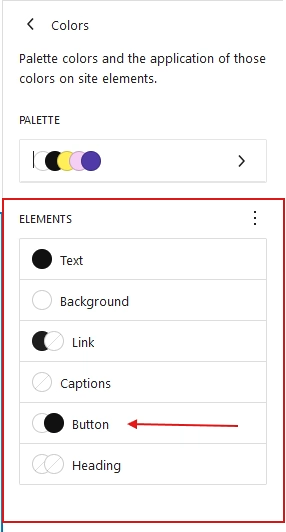
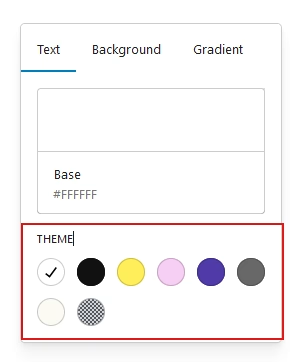
- You’ll see three tabs for button colors: Text, Background, and Gradient.
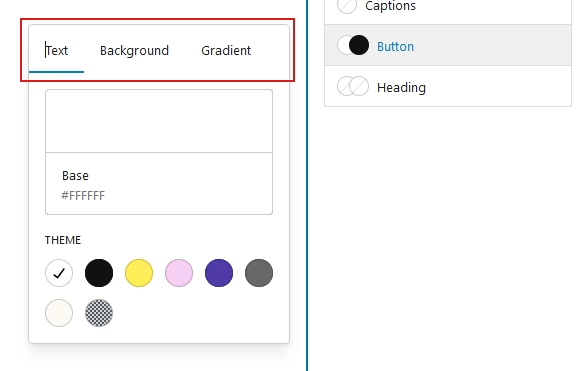
- To update a button’s colors:
- Use the color box to choose a custom color.
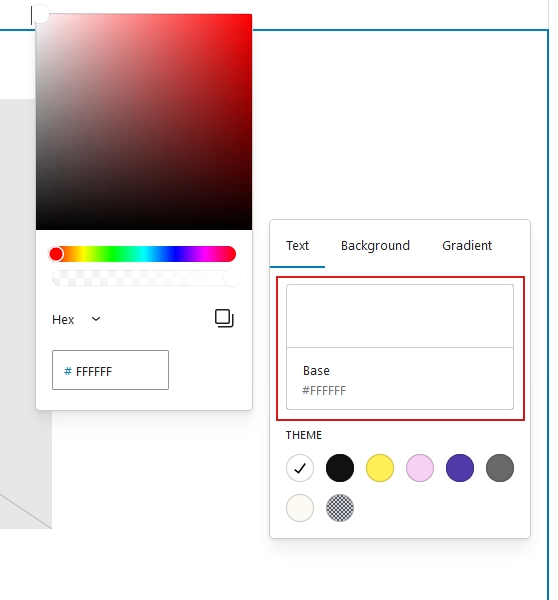
- Alternatively, select a predefined color from the default palette under the Theme section.
Updating Link Colors and Hover States
- Select the Link element in the Colors panel.
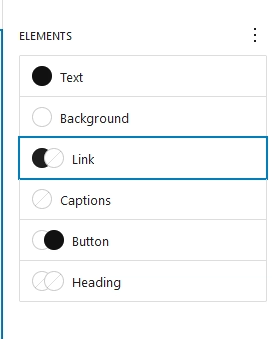
- Adjust the default state or hover state colors by toggling the corresponding tabs in the color settings box.
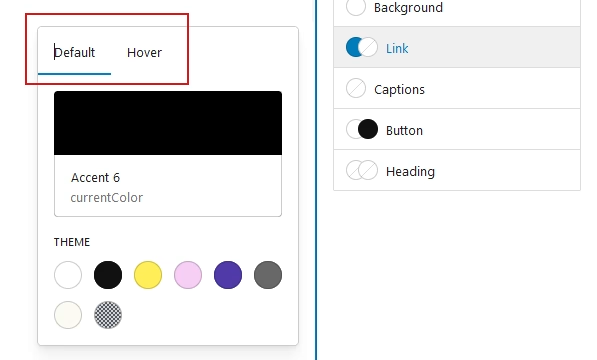
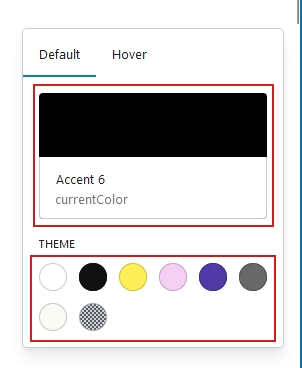
- Use the color box to select a new color or apply a color from the default palette.
Conclusion
Customizing your WordPress color palette is a simple yet powerful way to enhance your website’s visual appeal. By understanding how to access and modify global color settings, apply predefined palettes, and customize individual elements like buttons and links, you can create a site that is both aesthetically pleasing and aligned with your brand identity. Start experimenting with these tools today to give your website a fresh, personalized look!
Related Articles You Might Enjoy
Looking to deepen your WordPress knowledge? Check out these helpful guides:
- How to Edit Typography in WordPress: Install Fonts, Set Responsive Sizes, and Enhance Your Design
- The Complete Guide to WordPress Page Templates 2025
- How to Create Headers, Footers, and More in WordPress 2025: A Guide to Template Parts
Dive into these articles and take your WordPress skills to the next Level.
