Typography is a fundamental aspect of web design, influencing both aesthetics and readability. This tutorial will guide you through the process of customizing typography styles in the WordPress Editor, ensuring your website reflects your unique design vision.
1. How to Access and Customize Typography Settings in WordPress
To begin editing typography styles:
- Log in to your WordPress dashboard.
- Navigate to Appearance > Editor to access the Full Site Editor.
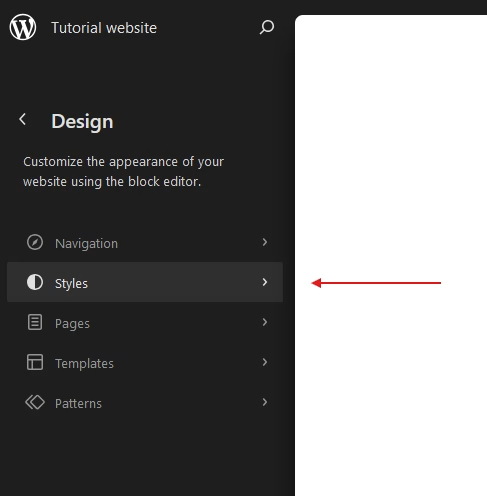
- Click on the Styles button in the sidebar.
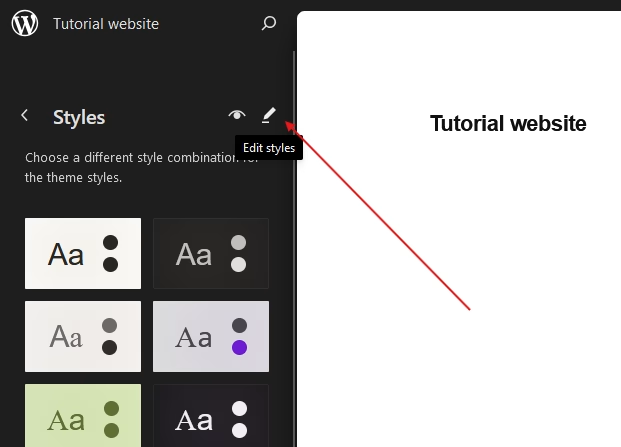
- In the Styles section, click on the Edit Styles icon in the top-right corner.
- Select Typography from the Styles panel to view the global typography settings.
2. How to Use the WordPress Fonts Library for Installed Fonts
The WordPress Editor includes a default set of fonts. To use these:
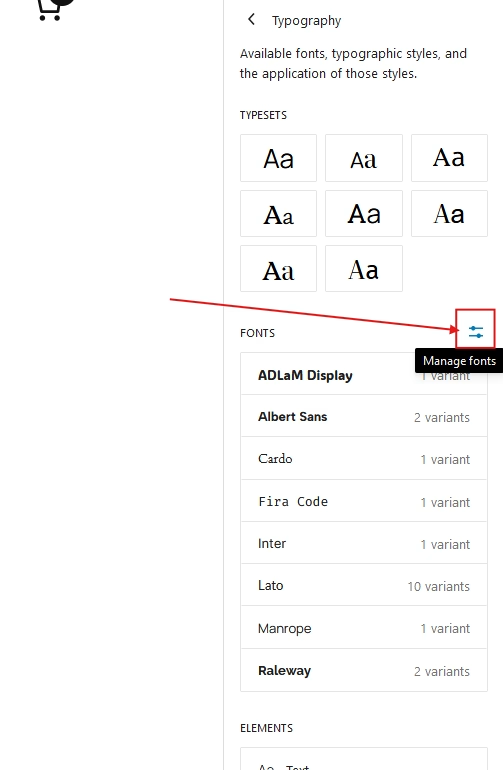
- In the Typography panel, click on the Manage Fonts icon beside the FONTS section.
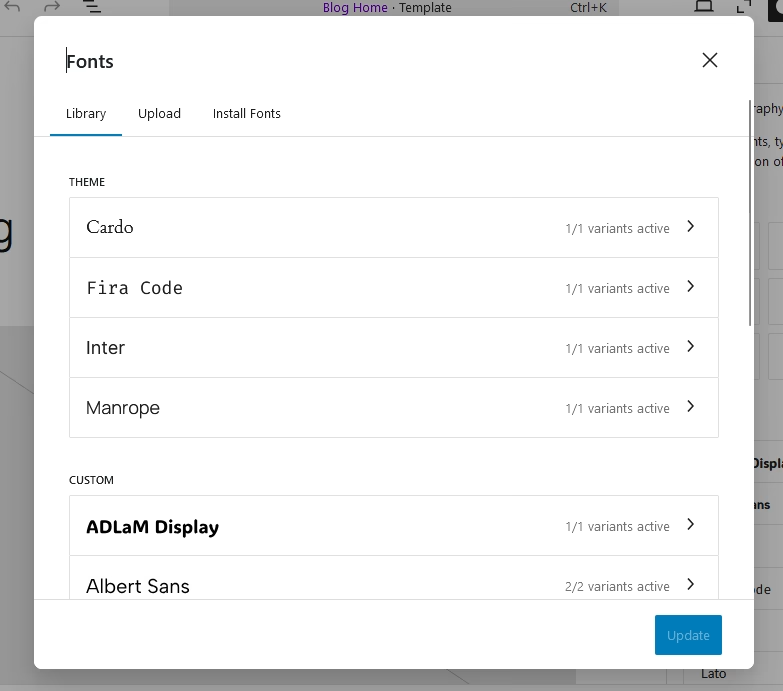
- Browse the installed fonts in the Library tab, which has two sections:
- THEME: Fonts available in your theme.
- CUSTOM: Fonts you activate manually.
- To activate a custom font:
- Select a custom font.
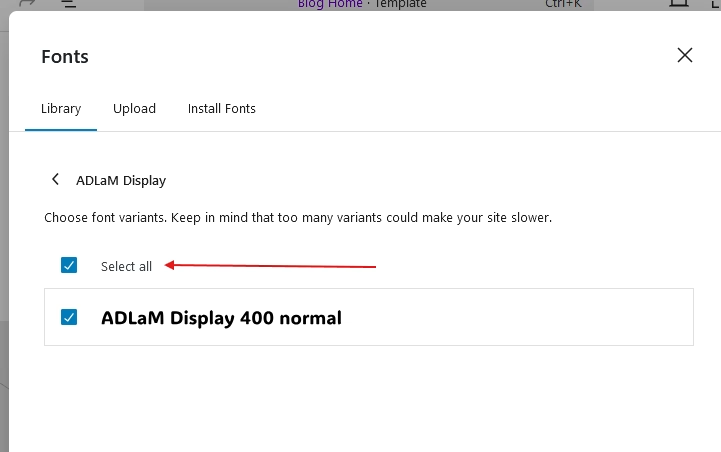
- Choose the desired font variants or click Select All to include all variants.
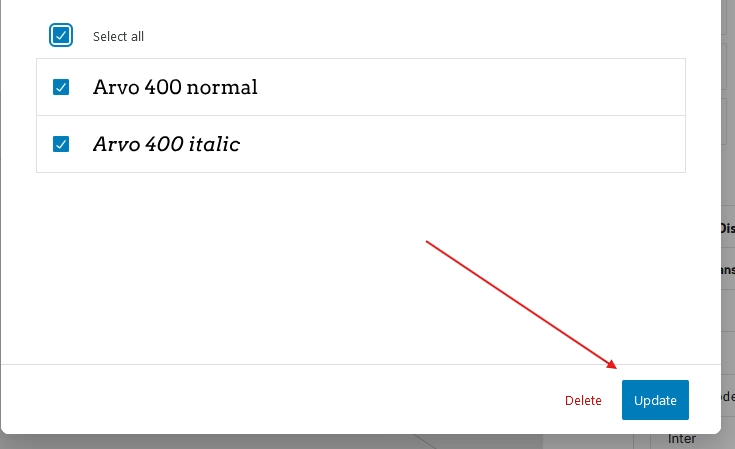
- Click Update to add the font.
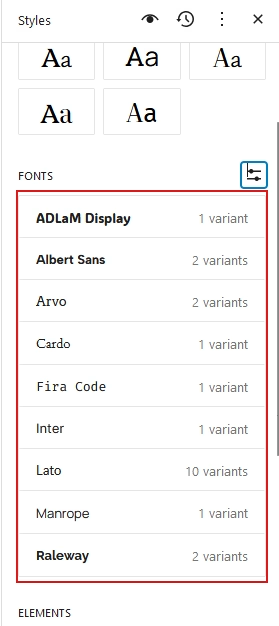
- Check the activated font in the FONTS section of the Typography panel.
3. How to Upload Custom Fonts in WordPress
To use local fonts:
- In the Typography panel, click on the Manage Fonts icon beside the FONTS section.

- Go to the Upload tab.
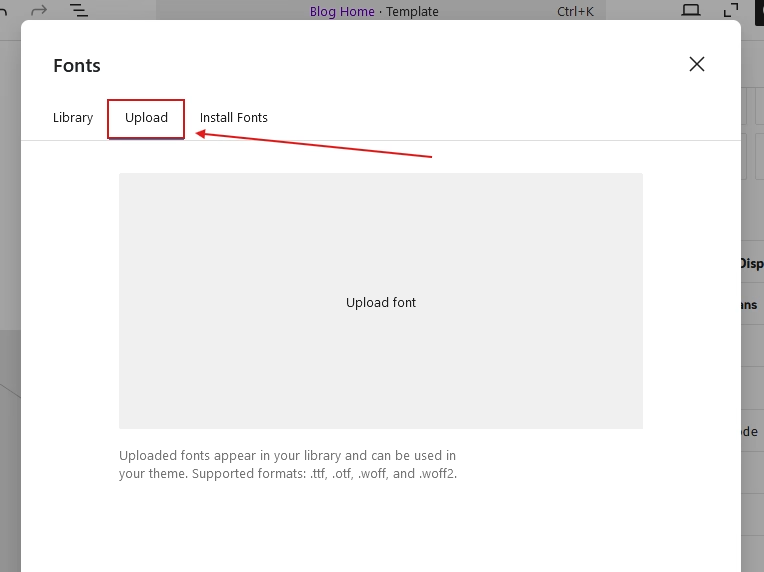
- Upload font files in formats such as
.ttf,.otf,.woff, or.woff2.
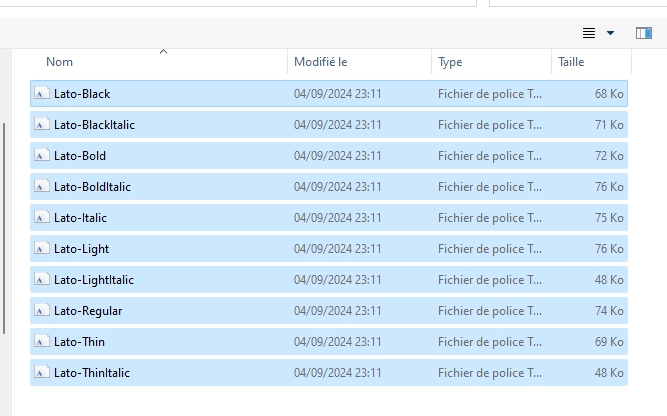
- Activate the uploaded font:
- Return to the Library tab.
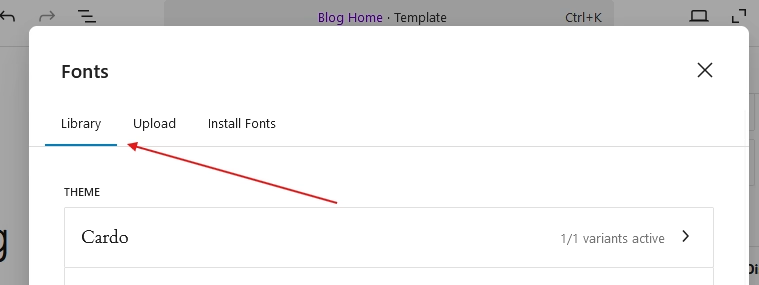
- Locate the new font in the CUSTOM section.
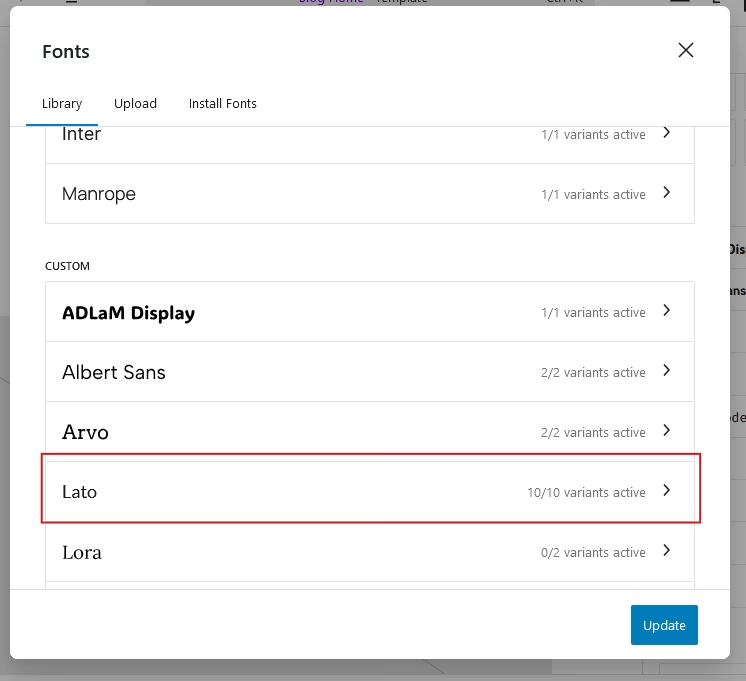
- Select the font and desired variants (or click Select All).
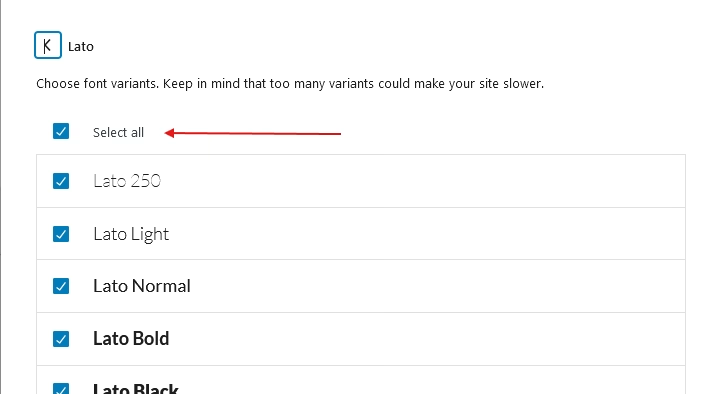
- Click Update to add the font.

- Verify the new font in the FONTS section of the Typography panel.
4. How to Install Google Fonts in WordPress for Enhanced Typography
To add Google Fonts:
- In the Typography panel, click on the Manage Fonts icon beside the FONTS section.

- Go to the Install Fonts tab.

- Allow access to Google Fonts.
- Search for a font using the search field or select one from the list.
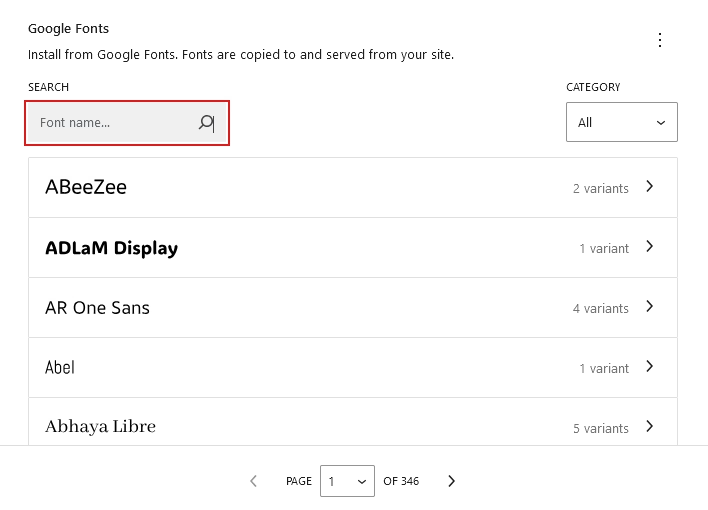
- After selecting a font, choose font variants and click Install.
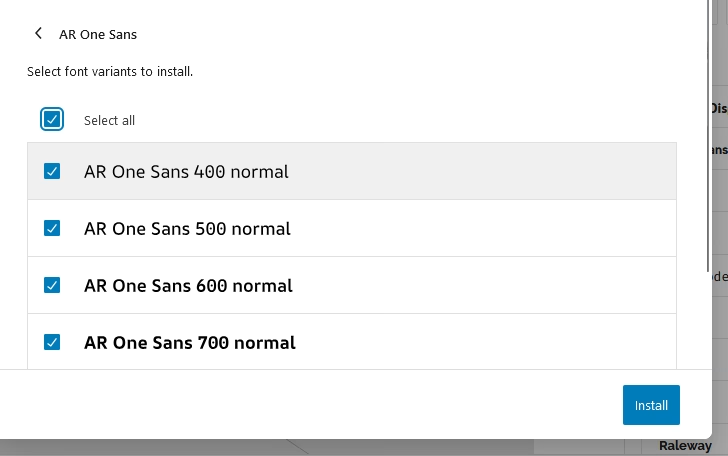
- Activate the new font:
- Return to the Library tab.
- Locate the installed font in the CUSTOM section.
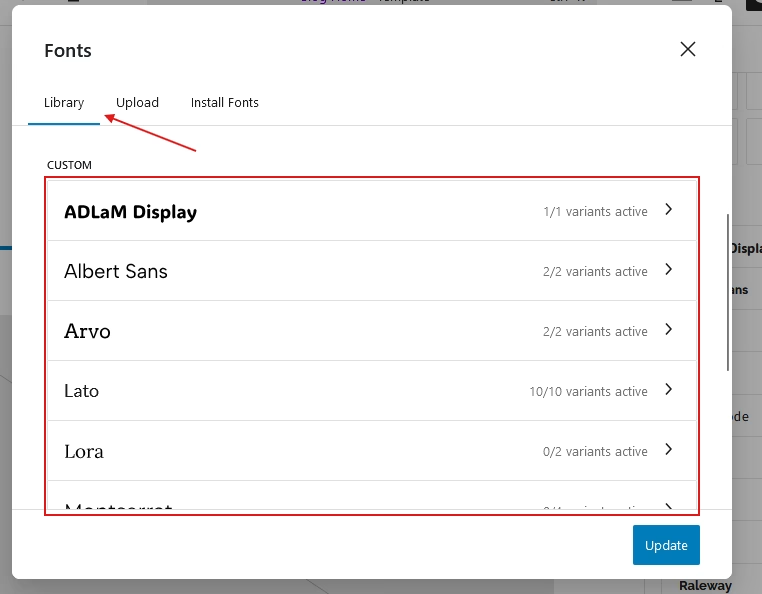
- Select the font and variants (or click Select All).
- Click Update to add the font.
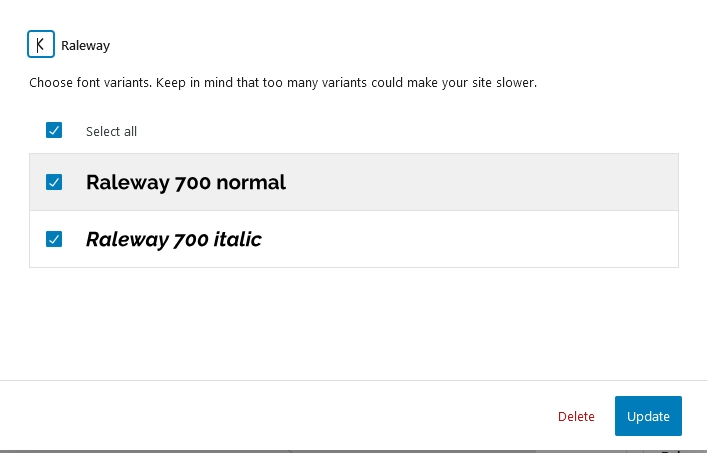
- Verify the new font in the FONTS section of the Typography panel.
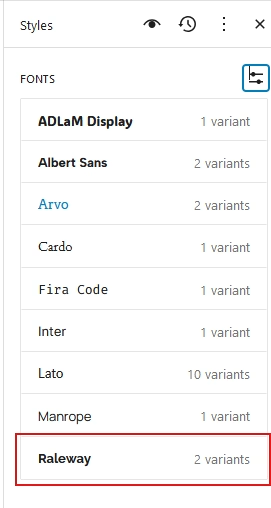
5. How to Customize Global Typography Settings for Key Elements in WordPress
WordPress allows you to customize font styles for elements like paragraphs, links, headings, captions, and buttons. These changes apply site-wide for consistency. Here’s how:
- In the Typography panel, navigate to the ELEMENTS section.
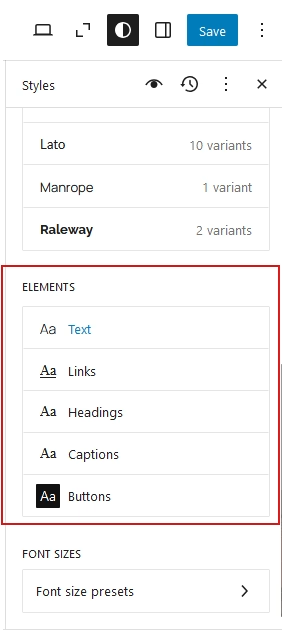
- Select an element (e.g., Text).
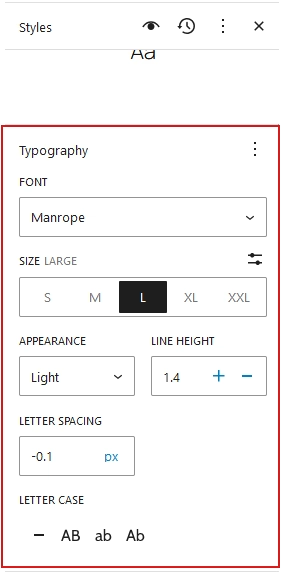
- Adjust settings such as:
- Font Face
- Font Size
- Font Weight
- Line Height
- Letter Spacing
- Letter Case
- To reset to default settings, click the three dots in the top-right corner and select Reset All.
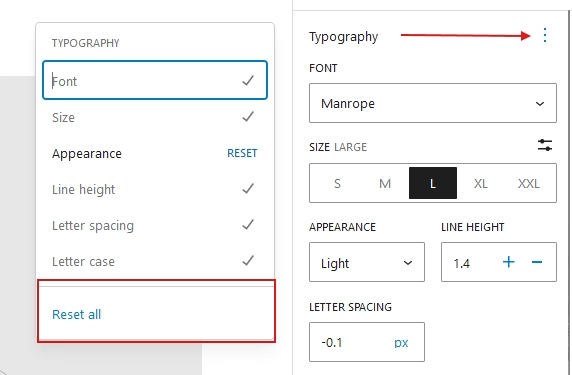
Changes will apply site-wide, impacting both the theme design and content.
6. How to Customize Font Presets and Add Responsive Typography in WordPress
The WordPress Editor provides font presets for predefined sizes (e.g., S, L, XL). You can also assign responsive sizes to ensure fonts adjust seamlessly across devices. Here’s how:
- In the Typography panel, go to Font Sizes and select Font size presets.
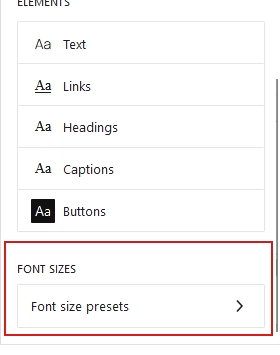
- Choose a preset and modify its size in the SIZE field.
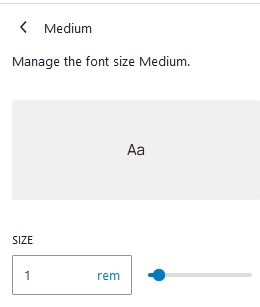
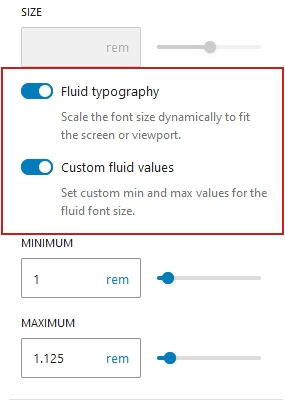
- For responsive sizes:
- Enable Fluid Typography and select Custom Fluid Values.
- Define the minimum and maximum sizes to adjust font sizes for small and large screens.
7. Create a New Font Preset
To create custom font presets:
- In the Font Size Presets section, go to CUSTOM and click the + button.
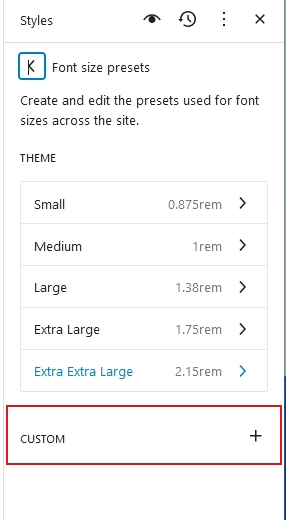
- After creating the preset, select it to rename and customize its settings.
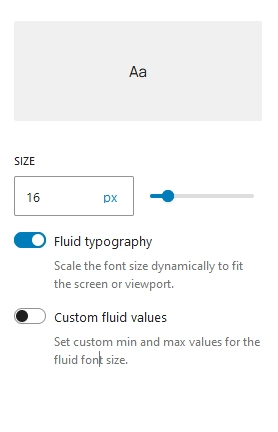
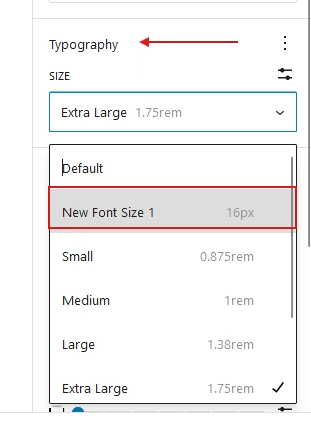
- The new preset will be available in the typography options for text elements. To use it:
- Select a text element.
- Navigate to Typography > SIZE.
- Choose the custom preset from the dropdown menu
Conclusion
By following these steps, you can customize typography in WordPress to match your design preferences and improve readability. Experiment with different styles and settings to find the best fit for your website.
Related Articles You Might Enjoy
Looking to deepen your WordPress knowledge? Check out these helpful guides:
- Mastering Navigation in the 2025 WordPress Editor: A Step-by-Step Guide
- The Complete Guide to WordPress Page Templates 2025
- How to Create Headers, Footers, and More in WordPress 2025: A Guide to Template Parts
Dive into these articles and take your WordPress skills to the next level.
