
Do you want to learn about Figma from the ground up? You are in the right place.
Figma comes with a hundreds of features to assist you in creating fantastic websites. While every tool has its place in specific situations, just a few are absolutely necessary for getting the most out of Figma. Follow along as we walk you through the most important Figma features in clear step-by-step tutorials.
This tutorial is designed for absolute beginners and will teach you how to move a Figma file onto a team.
So, without further ado, let’s get started.
1 – Move Figma drafts files onto a team
To move your file from the Drafts area to a team project,
- Head to the drafts area in the Figma file browser sidebar.
- Select and Hold your draft file then drag and drop it to a team project in the sidebar.
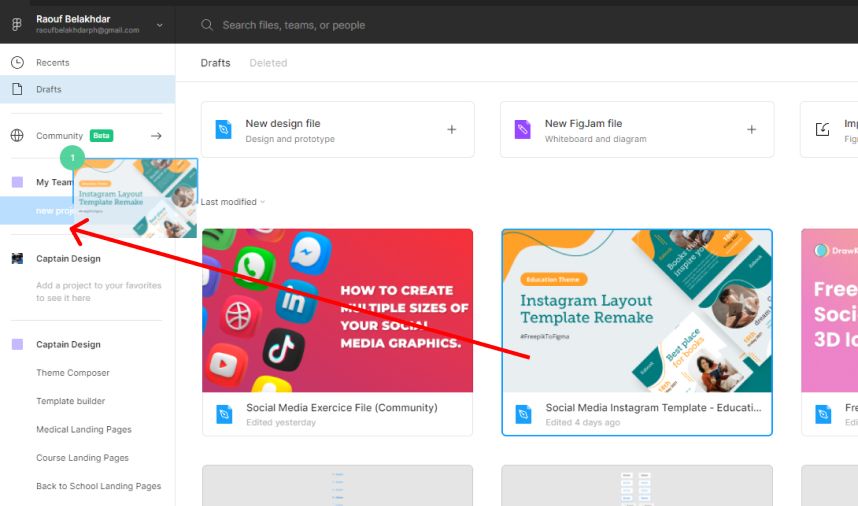
To preview your file, select the team project in the sidebar menu.

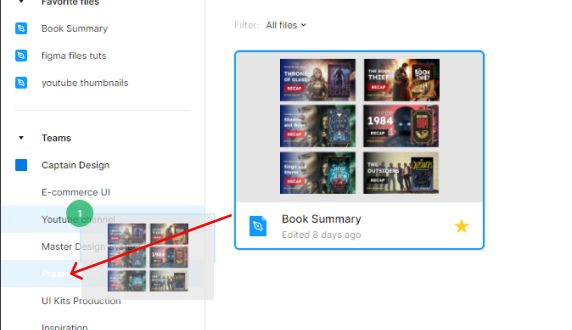
2 – Move Figma files between projects in your team.
- To view the files list you want to transfer to another project in the file browser sidebar, select a team project.

- Select and Hold your project file then drag and drop it to another team project in the sidebar.
Conclusion
Congratulations, you now know how to move a Figma file onto a team! I hope you found this tutorial helpful; if so, you’ll appreciate our other Figma tutorials. If you want to continue your Figma learning experience, we’ve got you covered with everything from creating a new file to organizing your files to collaborating with your team.
Please share this tutorial with your friends who want to learn Figma; it would mean a lot to us. We’ll see you in the next Figma tutorials.