WordPress Full Site Editing (FSE) provides a powerful and flexible Navigation block that allows users to design and customize menus directly from the WordPress editor. In this guide, we will break down the process step by step to help you effectively use the Navigation feature.
Understanding the Navigation Block
The Navigation block is a core block in WordPress FSE that enables you to create menus for your website.
It allows you to:
- Add, rearrange, and remove menu items.
- Link to pages, posts, categories, or custom URLs.
- Customize styles, alignment, and spacing.
- Manage responsive behavior for mobile and desktop views.
Accessing the Navigation Menus
The Navigation settings are situated in the sidebar of the WordPress editor as the first item.
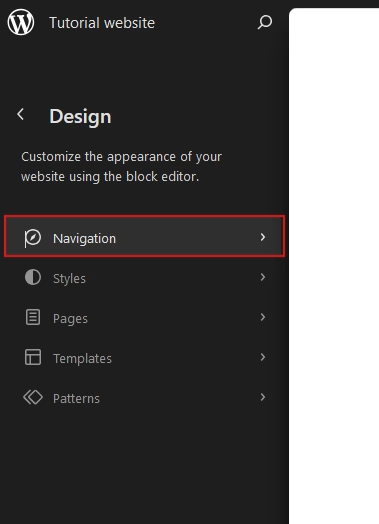
From here, you can:
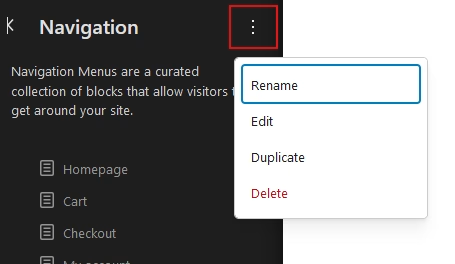
- Edit existing menus: Rearrange items, update links, or adjust design settings.
- Duplicate menus: Copy a menu for reuse.
- Rename or delete menus: Manage your menu list.
Adding a Navigation Block
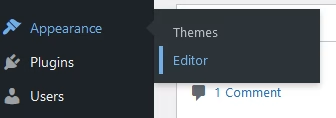
1 – Open the WordPress Editor
Start by opening the WordPress Editor to begin editing your page or template.
2 – Go to Patterns > Header
Navigate to Patterns > Header and select “Header” from the Pattern Gallery. This pattern serves as the default structure for the navigation in your site’s theme.
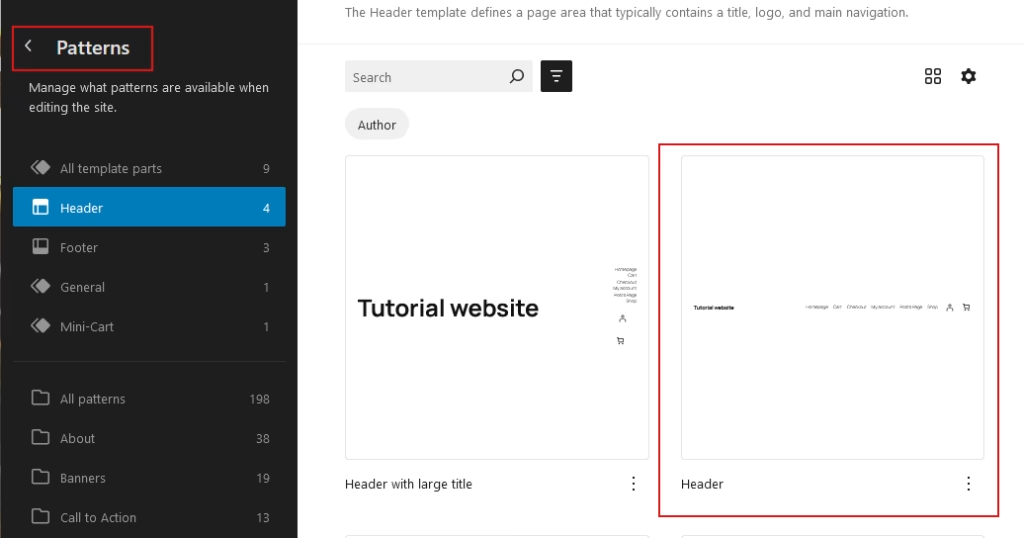
3 – Remove the Default Menu
To begin, I’ll remove the default menu from the pattern. Then, I’ll add a new one to show you how to use the navigation block.

4 – Add a New Navigation Block
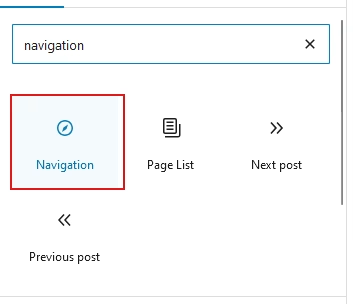
To add a navigation block, click the + button to add a new block. In the search bar, type “Navigation” and select the Navigation block.
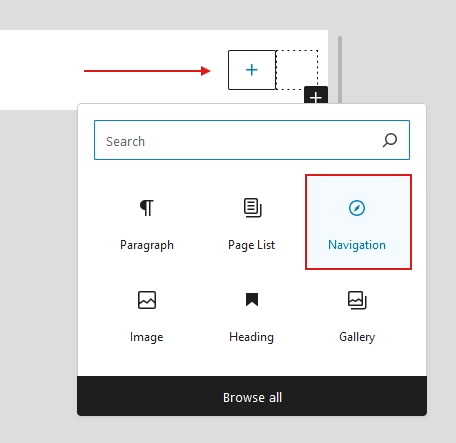
5 – Insert the Navigation Block
Once selected, insert the Navigation block into your design. WordPress will automatically add a list of links from your existing pages, if available, as the default menu.

6 – Edit the Menu
To customize the menu, use the Menu section in the sidebar. Here, you can adjust the links as needed.
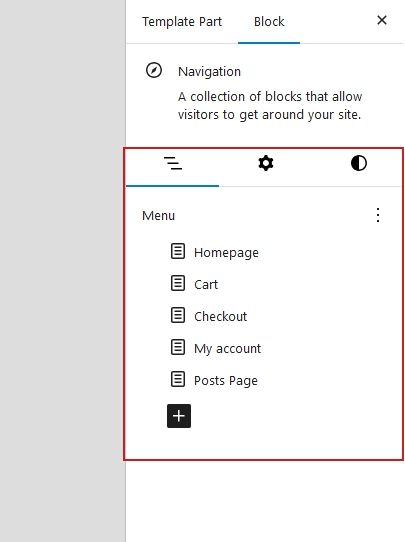
7 – Additional Options
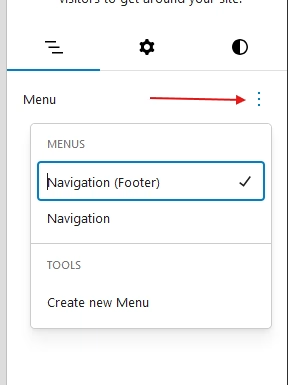
- Select an Existing Menu: If you have a pre-existing menu, click the three dots in the top-right corner of the menu section to select it.
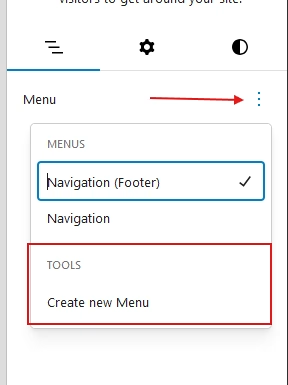
- Create a New Menu: Alternatively, you can create a brand new menu by selecting the option to create a new one within the sidebar.
Adding and Managing Menu Items
Menu items define the content of your navigation. Here are the available types:
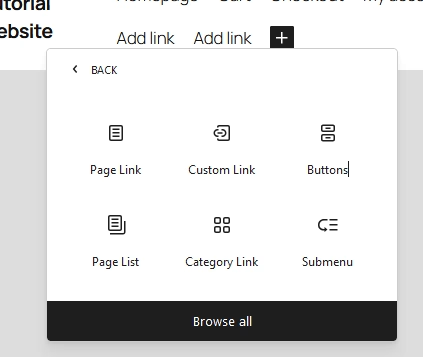
- Page Links: Direct links to specific pages like “About Us.”
- Custom Links: Manually added URLs for external sites or unique paths.
- Page Lists: Dynamic lists of all site pages, automatically updated.
- Category Links: Links to post archives for specific categories.
- Submenus: Dropdown menus under a parent menu item for better organization.
- Home Links: Direct users to your site’s homepage.
- Buttons: Styled elements for actions like “Sign Up” or “Shop Now.”
- Product Links (WooCommerce): Links to products or categories in your WooCommerce store.
Steps to Add Menu Items:
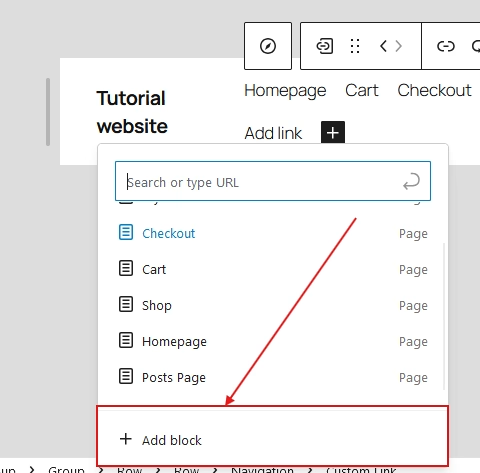
1 – Click + Add Block in the Navigation Block
Inside the Navigation block, click the “+ Add Block” button to add new items to your menu.
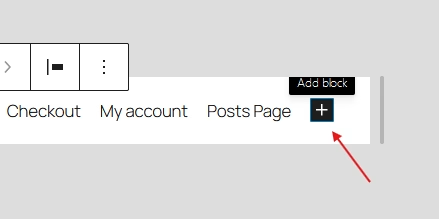
- Select + Add Block in the block modal.
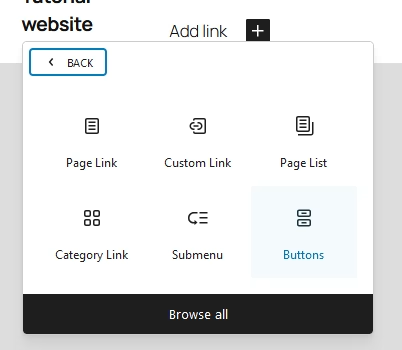
2 – Select the Item Type
In the block modal, choose the type of item you want to add (e.g., a page link, custom URL, etc.)
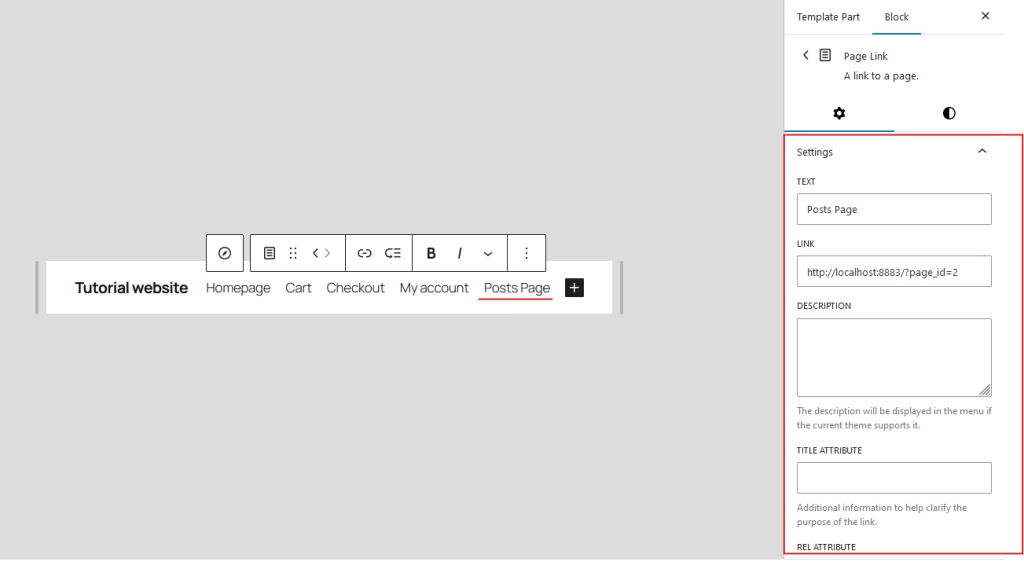
3 – Customize the Link or Item Settings
To change the link path or customize any item’s settings, simply select the item, then go to the sidebar where you can edit its properties, such as the link URL or appearance.
Customizing Navigation
The Navigation block offers robust customization options to match your design:
- Alignment: Choose left, center, or right alignment.
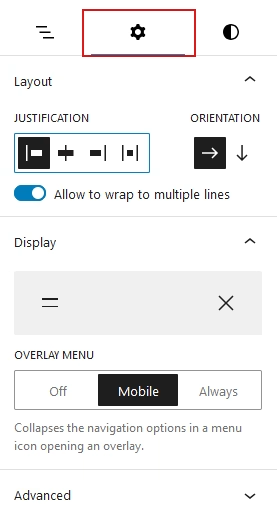
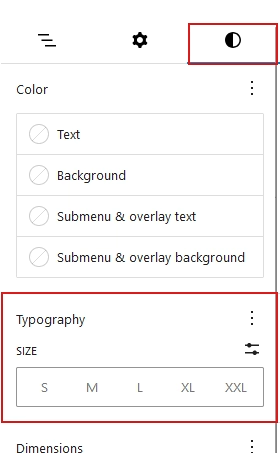
- Typography: Adjust font size, style, and weight.
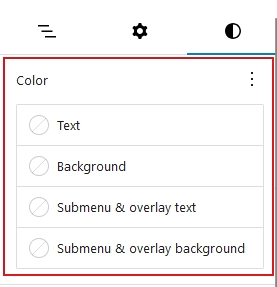
- Color and Background: Modify text and background colors for better visibility.
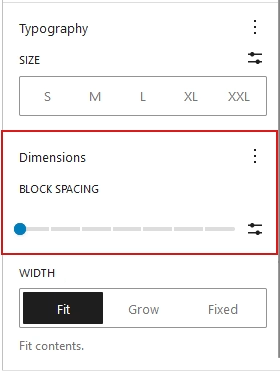
- Spacing: Customize padding and margins for block layout.
Submenus and Dropdowns
Submenus allow for hierarchical navigation. They’re ideal for organizing content-heavy sites.
Creating a Submenu:
- Drag and drop an item slightly to the right of the item that you decide it’s a parent.
- The submenu will automatically appear as a dropdown.

Responsive Navigation
The Navigation block adapts to various screen sizes. For mobile menus:
- Open the Responsive Options in Block Settings sidebar.
- Customize the toggle button in the Display section for compact navigation.
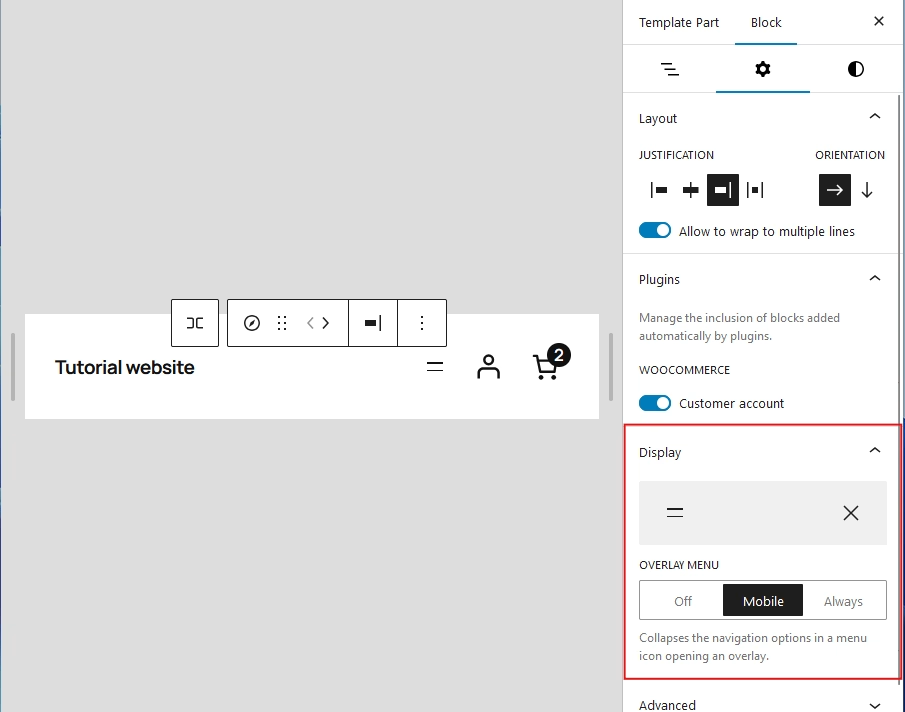
- Test on different devices to ensure usability.
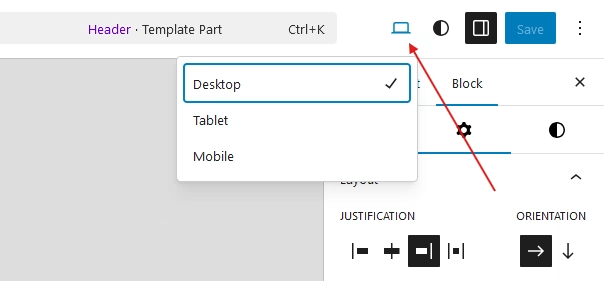
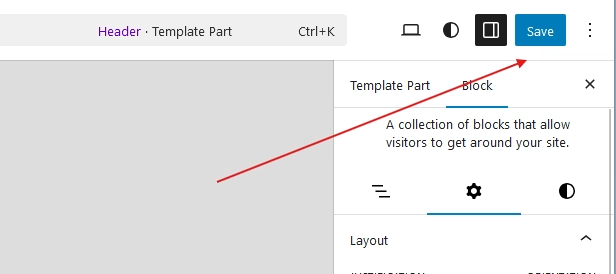
Saving and Testing Your Navigation
Always test your menus after making changes:
- Click Save or Publish to confirm updates.
- Preview your site on desktop, tablet, and mobile devices.
- Verify that all links and dropdowns work correctly.
Troubleshooting Tips
- Menu Missing: Ensure the Navigation block is placed in a visible template part (e.g., Header).
- Broken Links: Double-check URLs and settings for custom links.
- Design Issues: Use CSS for advanced styling or reconfigure the block settings.
Conclusion
Mastering the Navigation block in WordPress FSE is essential for creating a user-friendly website. Use the steps outlined here to design menus that suit your site’s needs. With a bit of experimentation, you’ll create navigation menus that are both functional and visually appealing.
Related Articles You Might Enjoy
Looking to deepen your WordPress knowledge? Check out these helpful guides:
- How to Create and Organize Posts in WordPress – WordPress 2025
- How to Create Pages and Set a Static Homepage in WordPress 2025
- WordPress 2025 – Step-by-Step Guide to Installing a WordPress Theme
Dive into these articles and take your WordPress skills to the next level!


