Templates are the blueprints for how different types of content are displayed on your WordPress site. They dictate the layout and structure for pages, posts, archives, and more. Whether you’re customizing a single post layout or designing the homepage, templates ensure your content appears consistently across your site. This guide will help you understand templates, template parts, and dynamic blocks—three critical components for working effectively with WordPress FSE.
1 – Templates: The Blueprints of Your Site
In WordPress FSE, templates act as the blueprints for displaying different types of content on your site. They control how pages, posts, or archives are structured and presented. For instance, a template determines whether your blog posts appear in a grid, list, or with featured images. By using templates, you ensure that your site’s layout remains consistent and visually appealing across all content types.
Default Templates
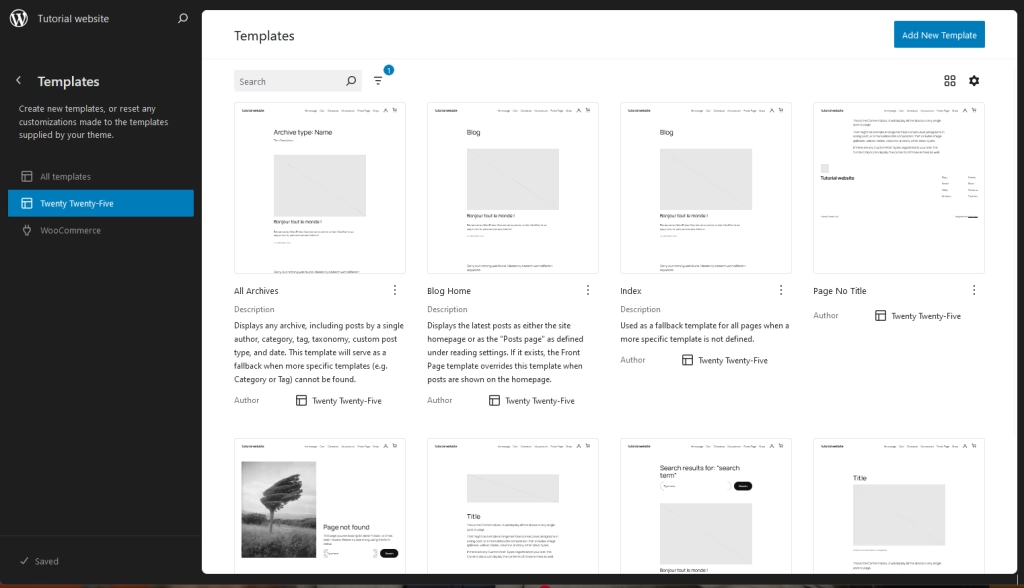
WordPress comes with a set of default templates to handle common content types:
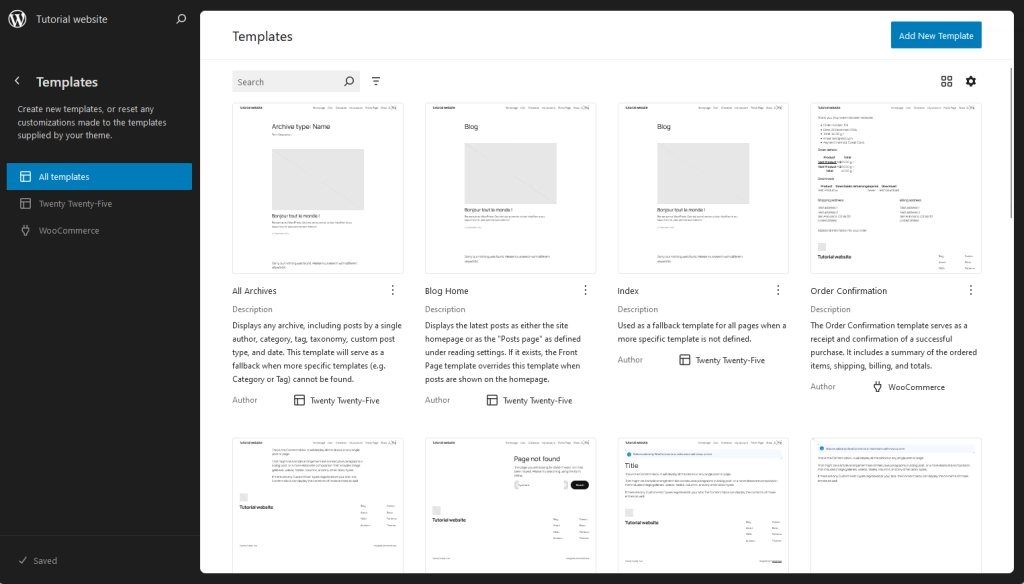
- All Archives: Defines the layout for all archive pages, such as categories, tags, or author archives.
- Blog Home: Determines the layout of the page where your latest posts are displayed (if your homepage is set to show posts).
- Index: The fallback template for any content type not explicitly defined.
- Page No Title: A custom template for static pages that removes the default page title.
- Page 404: The template shown when a page is not found on your site.
- Pages: A specialized template for static pages.
- Search Results: Displays the results of a search query.
- Single Posts: Defines how individual posts are displayed.
These templates give you a foundation to display your content appropriately and ensure a professional appearance for your website.
2 – Template Parts: Reusable Design Elements
Template parts are sections of a website, like headers or footers, that can be reused across different pages. Templates use these parts to create the layout, and when you update a part, it automatically changes everywhere it’s used. This makes it easier to keep your design consistent and saves time when editing.
Default Template Parts
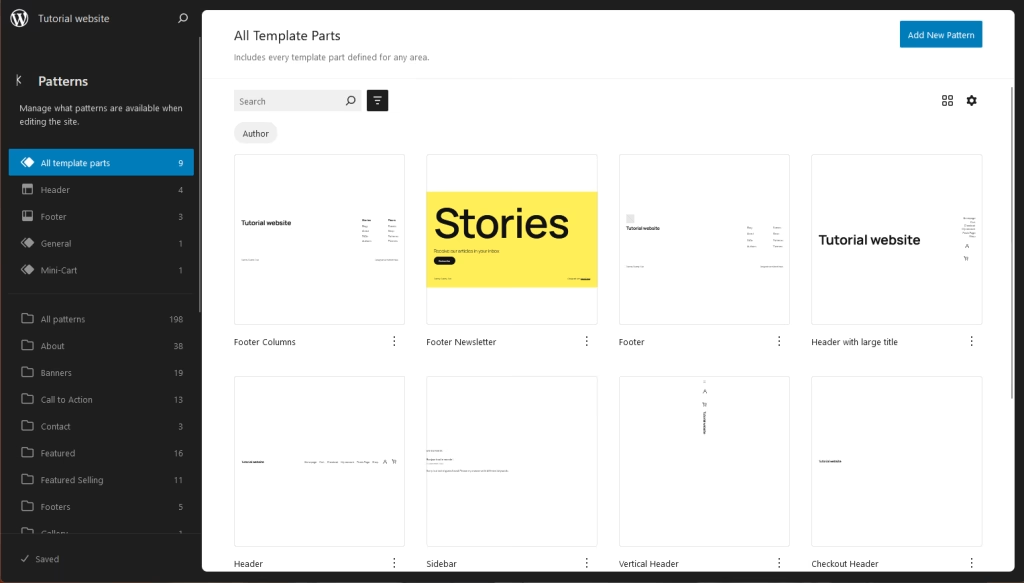
WordPress provides several default template parts to streamline your design process:
- Header: Includes your site’s logo, title, and navigation menu.
- Footer: Displays copyright information, links, and additional site navigation.
- Sidebar: Optional and often used for widgets or secondary navigation.
By organizing your templates into reusable parts, you can save time and ensure that changes are consistently applied throughout your site.
3 – Dynamic Blocks: Making Templates Adaptive
Dynamic blocks are the glue that connects templates and template parts, enabling them to display relevant content dynamically. They pull data from your WordPress database and render it based on the context of the page or post being viewed. This flexibility ensures that templates and template parts are not static but adapt to the content they are designed to display.
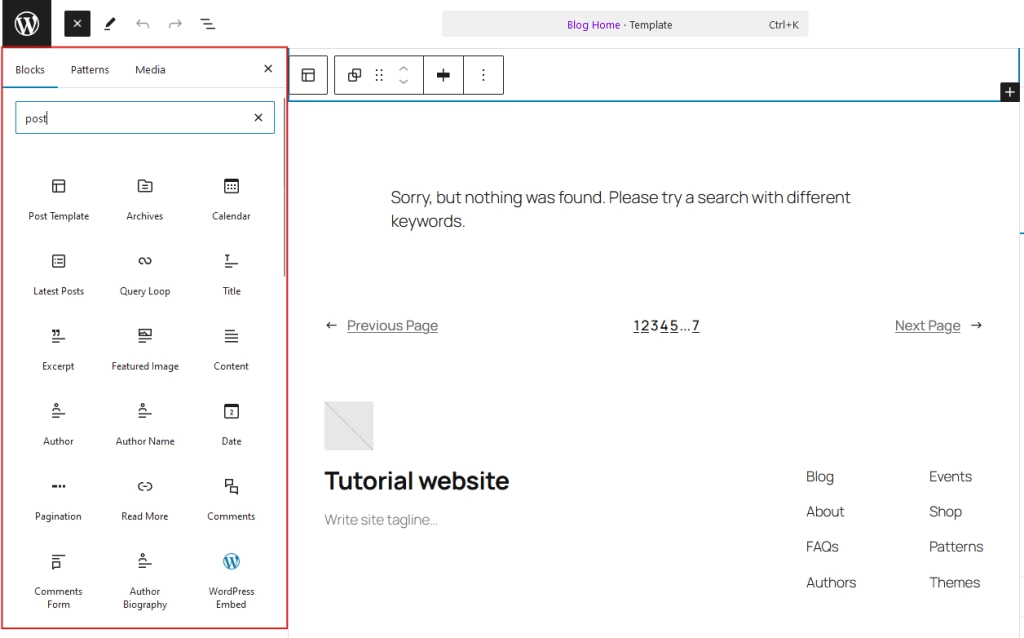
Below is a detailed list of the most commonly used dynamic blocks:
- Post Title: Displays the title of the current post or page.
- Post Content: Shows the main content of the post or page.
- Post Excerpt: Displays a summary of the post.
- Post Date: Shows the published date of the post.
- Post Author: Displays the author’s name.
- Post Categories: Lists the categories assigned to the post.
- Post Tags: Displays the tags assigned to the post.
- Featured Image: Shows the featured image of the post.
- Comments Block: Displays the comments section for the post.
- Navigation Block: Adds a customizable menu for site navigation.
- Site Title: Displays the title of your website.
- Site Tagline: Shows the tagline or slogan of your site.
- Site Logo: Displays your site’s logo.
- Query Loop: Creates a custom list of posts, such as a blog feed or portfolio.
- Archive Title: Displays the title of an archive page, such as the category name.
Dynamic blocks make your templates flexible, automatically adapting to the content being displayed.
Managing Templates: How to Edit and Create Them
If you’re designing a blog and want all posts to follow the same layout, like a large title, post content, and a sidebar, editing a template makes it easier. Instead of creating the layout for each post, you can edit the post template once. Any changes made to the template, like adding a banner image, will automatically apply to all posts, saving time and maintaining consistency across your site.
Editing Templates in the Site Editor
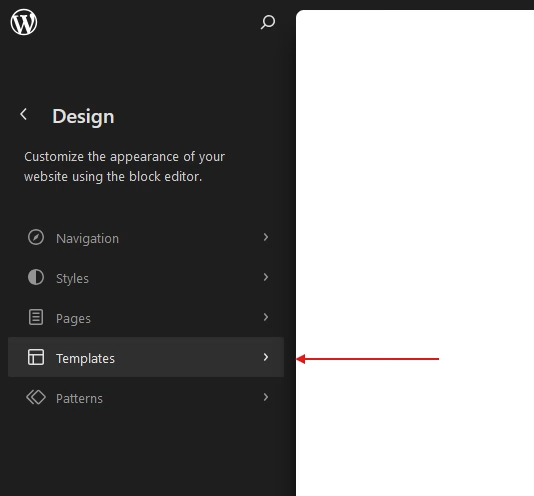
- Access the Site Editor: From your WordPress dashboard, go to Appearance > Editor.
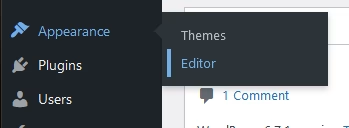
- View and Select Templates: Click Templates to view a list of all available templates.
Edit a Template:
- Choose the template you want to edit.
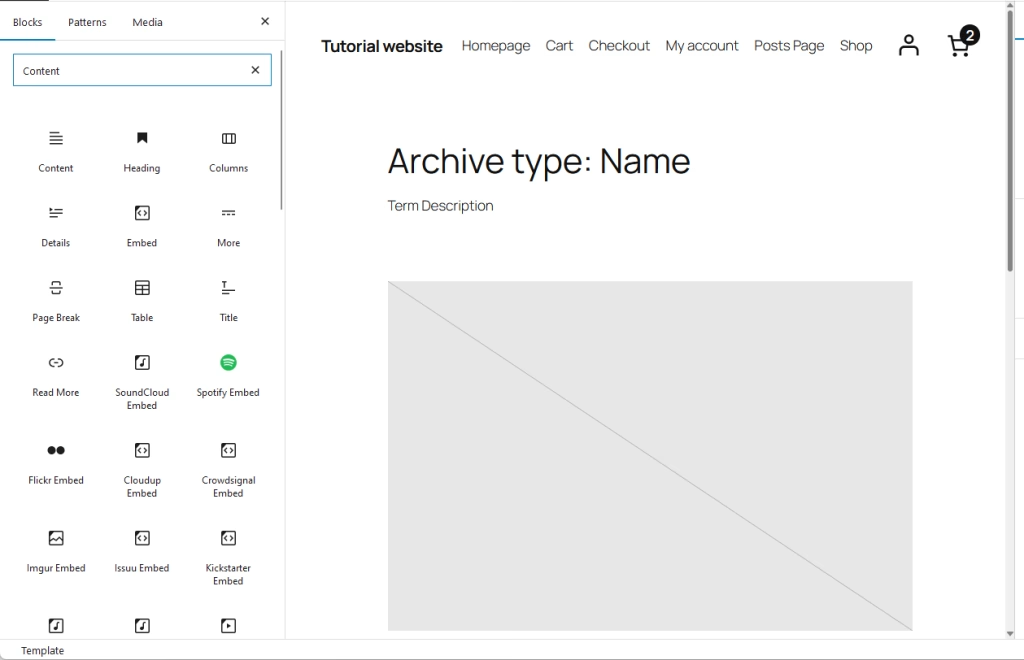
- Modify the layout using blocks. For example, you can add a Content block to automatically display content for your posts.
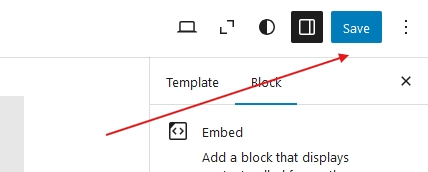
- Save Changes: Once you’re happy with your changes, click the Save button to apply them.
Creating a New Template
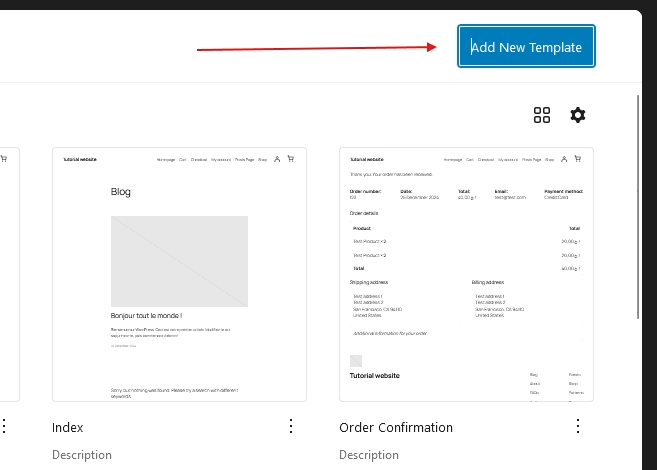
- Add New Template: In the Templates tab, click Add New Template to create a new template.
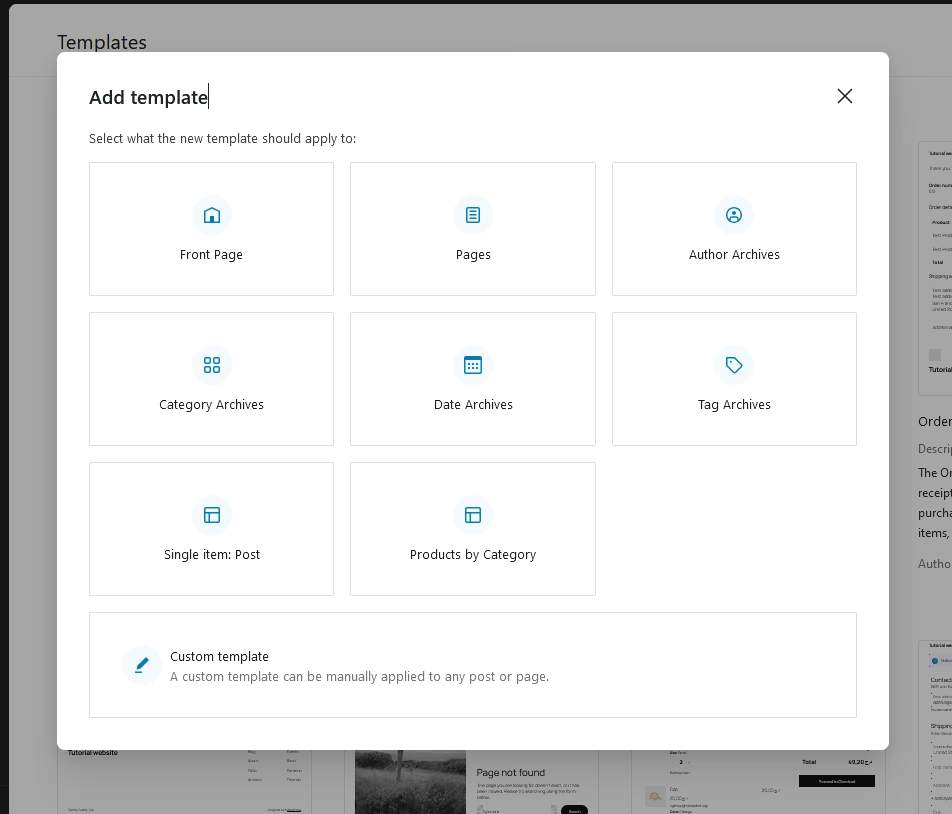
- Choose Template Type: Select the type of template, such as a specific Front page or Single post type.
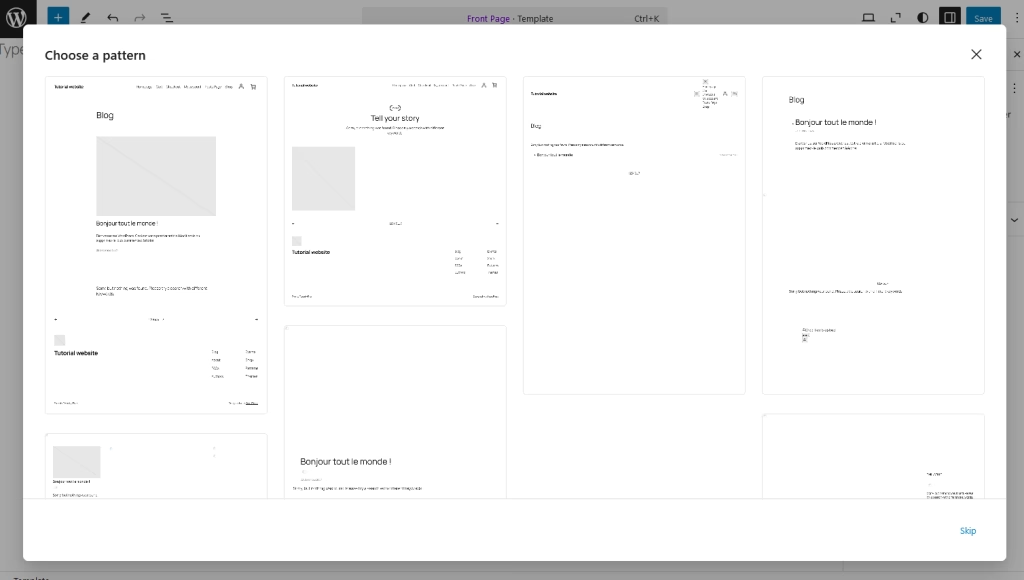
- Select a pattern for your new template, or skip this step and create your template’s blocks from scratch.
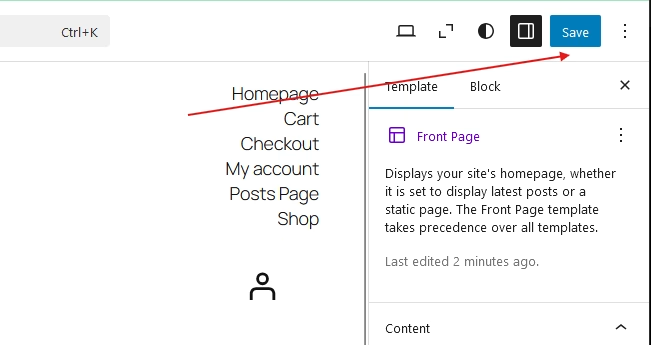
- Save and Assign: After customizing, click Save to store your template.
- Then, assign it to a specific content type or individual pages where you want it to appear.
Applying a Template to a Page
- Open the Page Editor:
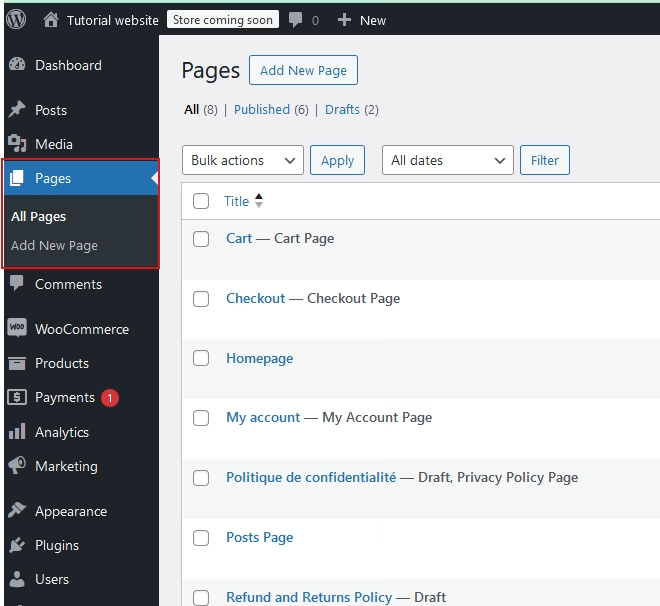
- From your WordPress dashboard, go to Pages and select the page you want to edit or apply a template to.
- Access Template Settings:
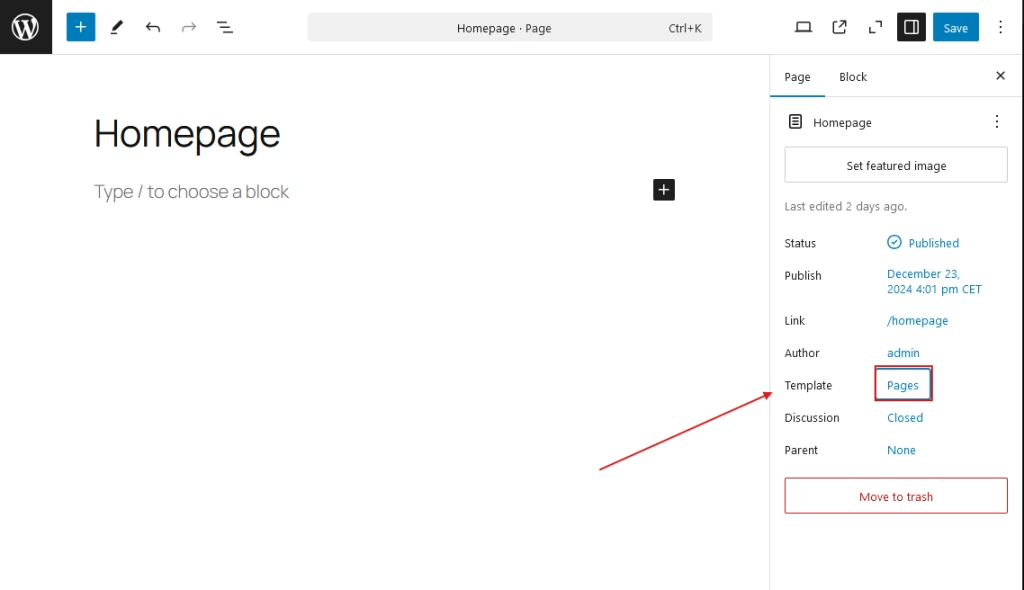
- In the page editor, locate the Template section on the right-hand settings panel.
- Select a Template:
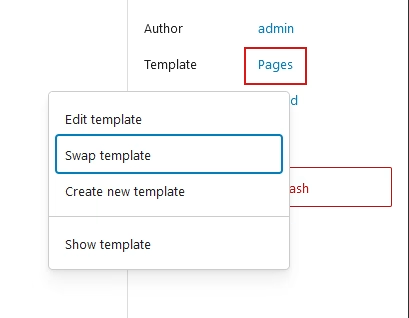
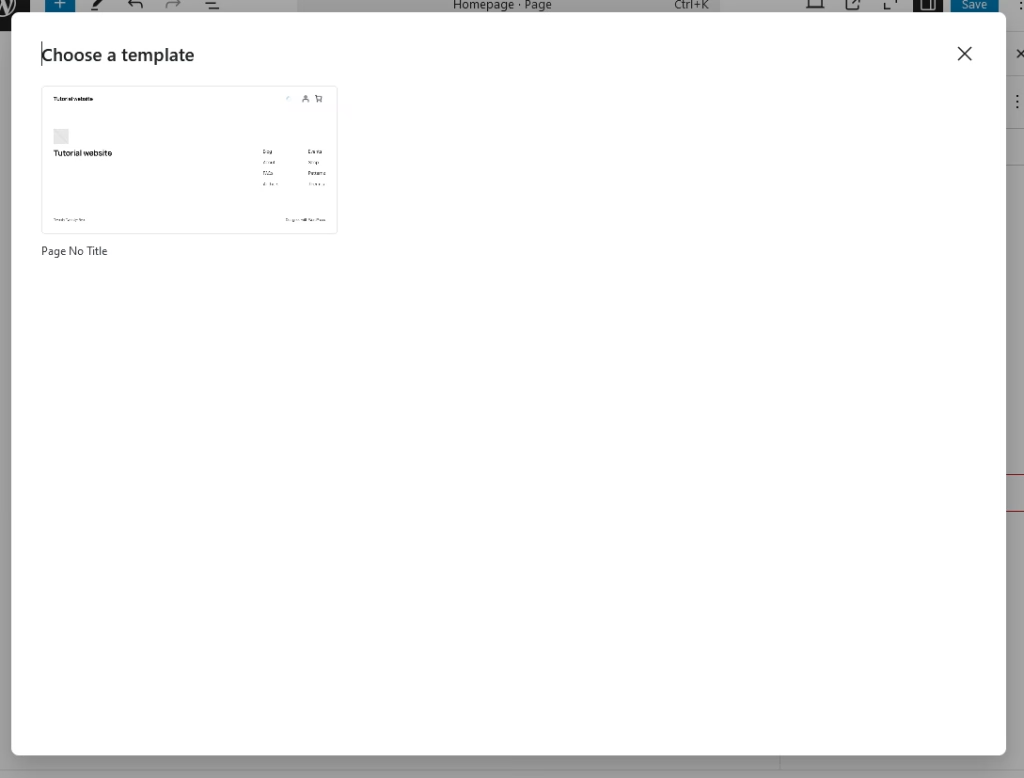
- In the Template dropdown, you’ll find a list of available templates. Choose the template you want to apply to this page.
- If you’ve created custom templates, they will be listed here as well.
- Save or Publish:
- After selecting the template, click Publish (for new pages) or Update (for existing pages) to apply the template.
- Preview the Page:
- Once saved, visit the page on your site to see how the template is applied and ensure the design appears as expected.
Applying a Template to a Post
- Open the Post Editor:
- From your WordPress dashboard, go to Posts and select the post you want to edit or apply a template to.
- Access Template Settings:
- In the post editor, find the Template section in the settings panel on the right side.
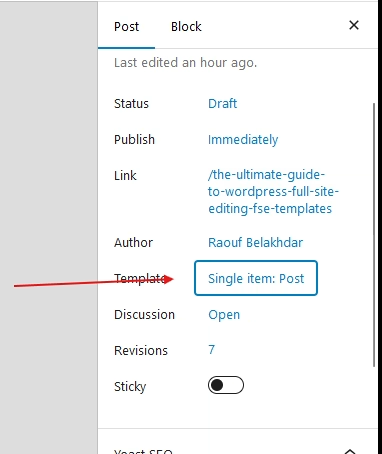
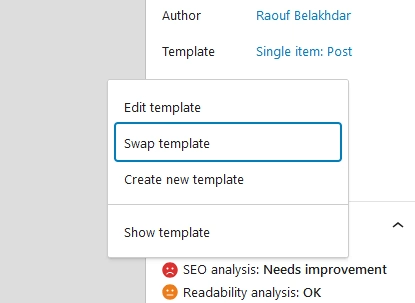
- Select a Template:
- From the Template dropdown, select the template you want to apply to this post. You will see a list of available templates, including any custom templates you’ve created.
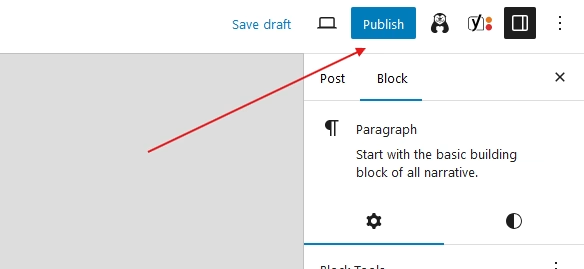
- Save or Update the Post:
- After selecting your template, click Update (for existing posts) or Publish (for new posts) to apply the template.
- Preview the Post:
- Once the post is saved, view it on your site to ensure the template is applied correctly and the layout matches your expectations.
Conclusion
Templates are powerful tools in WordPress that allow you to control the design and layout of your content with ease. Whether you’re applying templates to pages or posts, they help ensure consistency and save time by letting you reuse layouts across your site. With the step-by-step guidance provided in this article, you can confidently edit, create, and assign templates to suit your needs.
In the next article, we’ll dive deeper into template parts—the reusable building blocks like headers, footers, and sidebars—and explore how they work with dynamic blocks to create flexible, content-driven designs. Stay tuned to learn how to maximize these features for even greater control over your WordPress site!
Related Articles You Might Enjoy
Looking to deepen your WordPress knowledge? Check out these helpful guides:
- Mastering Navigation in the 2025 WordPress Editor: A Step-by-Step Guide
- How to Create and Organize Posts in WordPress – WordPress 2025
- How to Create Pages and Set a Static Homepage in WordPress 2025
- WordPress 2025 – Step-by-Step Guide to Installing a WordPress Theme
Dive into these articles and take your WordPress skills to the next level.


